Monday, February 26, 2018

Repurpose Your Rope: 3 Decorative DIYs to Try

These projects are as beautiful as they are budget-friendly, and best of all, you can easily make them in one afternoon. Ready to learn the ropes?

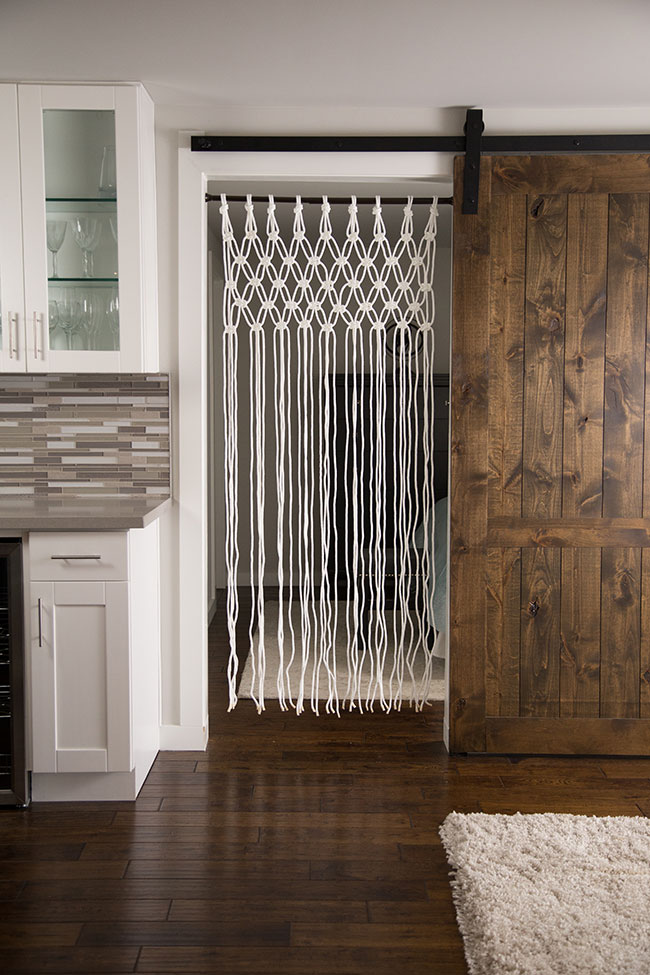
Macrame rope curtain

Modern, yet rustic. Warm, yet airy. And perfect for the doorway of your choosing.

Supplies

  • Scissors
  • Tension rod  
  • Masking tape 
  • 400 feet of 1/4-inch diamond braided nylon rope

Instructions

  1. Pick a doorway for your curtain and install the tension rod.
  2. Cut 18 strands of rope. Each one should be 17 feet long.
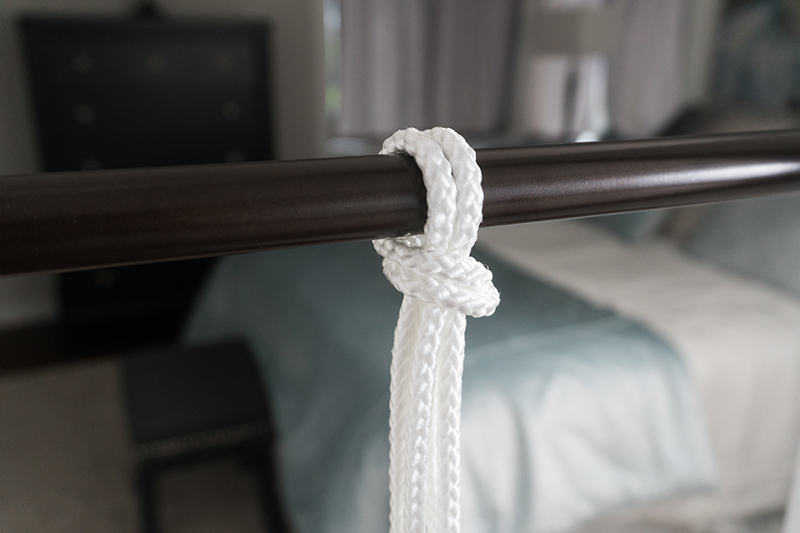
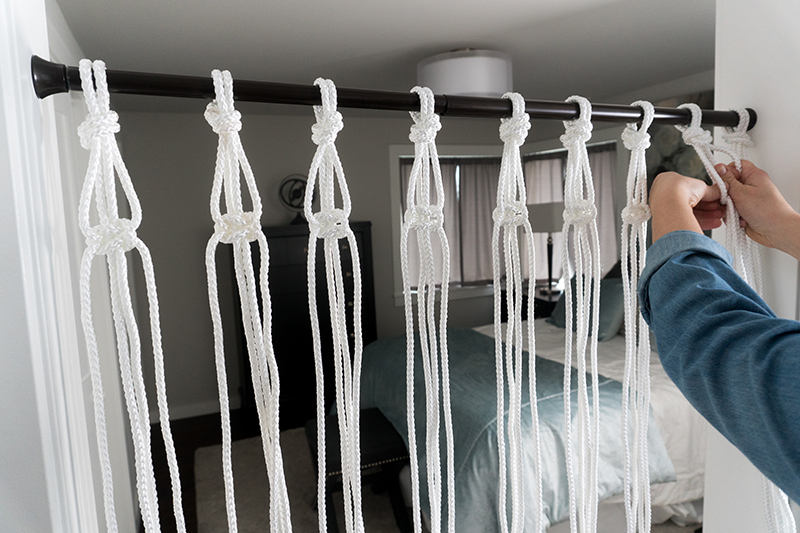
  3. Drape two strands of rope over the rod and line up the ends so you have four even strands.
  4. Secure the rope to the rod with a "four-in-hand" knot. To create this knot, hold two strands of rope in each hand. Then, cross one side over the other. Next, wrap the top strands around the bottom strands. Cross and wrap those same strands one more time, then pull them up and through the loop before tightening.
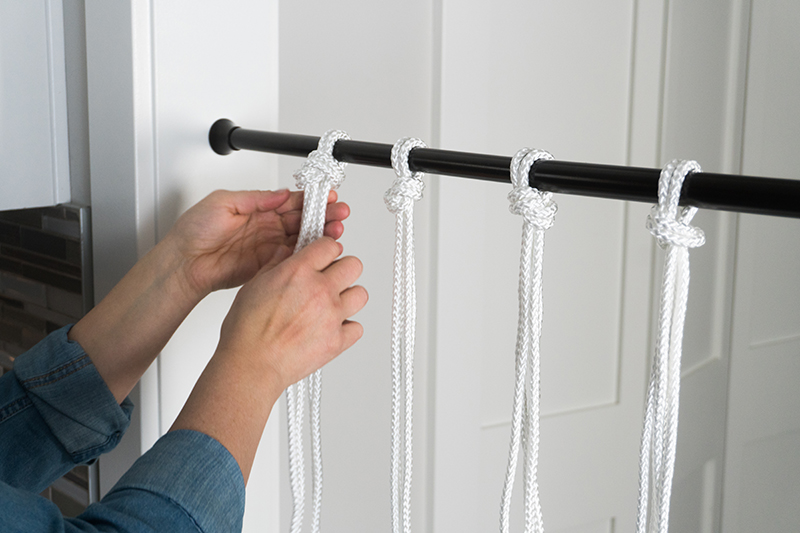
  5. Repeat steps 3 and 4 with the remaining strands.
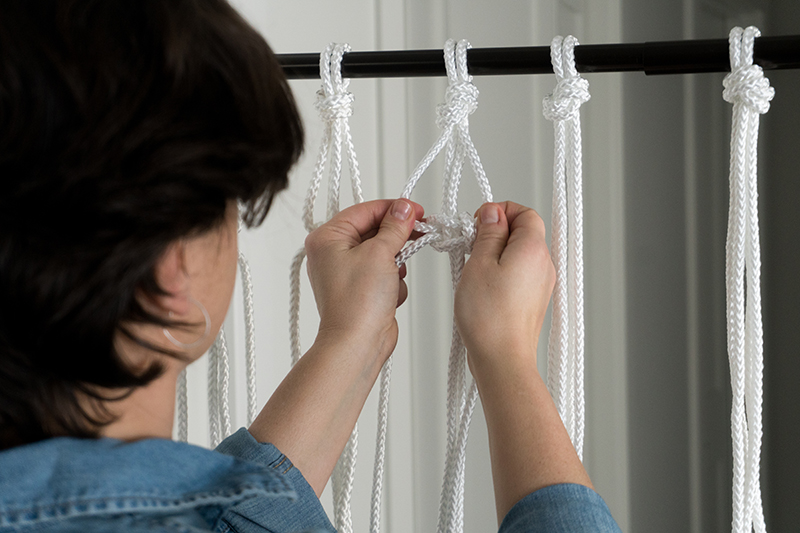
  6. Now the real macrame fun starts! Tie a square knot three inches below the base of the top knot. Grab the first section of hanging rope. There should be four strands to work with (one on the left, one on the right and two anchor strands in the middle). Position the strand on the left so it's under the two anchor strands in the middle, but over the strand on the right. Then, pull the right strand over the two anchor strands in the middle and through the loop on the left. Complete your square knot by reversing the steps on the other side. Move the strand on the right under the two anchor strands and over the strand on the left. Pull the left strand over the two anchor strands and through the loop on the right. Tighten it slightly.
  7. Repeat step 6 on each hanging section of rope. After completing this step, every hanging section of rope should have a macrame square knot.
  8. Now you'll begin to create more rows of macrame knots by braiding rope in the adjacent rows. Start three inches down from the first row of macrame knots and work left to right. Skip over the first two strands on the left, and create a square macrame knot with the last two strands on the right side of the first section and the first two strands on the left side of the second section.
  9. Repeat step 8 to work your way across the sections of hanging rope, creating a second row of square knots.
  10. Repeat step 6 to create the third row.
  11. Repeat step 8 to create the fourth row.
  12. Repeat step 6 to create the fifth row.
  13. To make sure the ropes don't fray, wrap masking tape at the bottom. Cut through the tape to make the ropes even.
  14. Admire your handiwork!
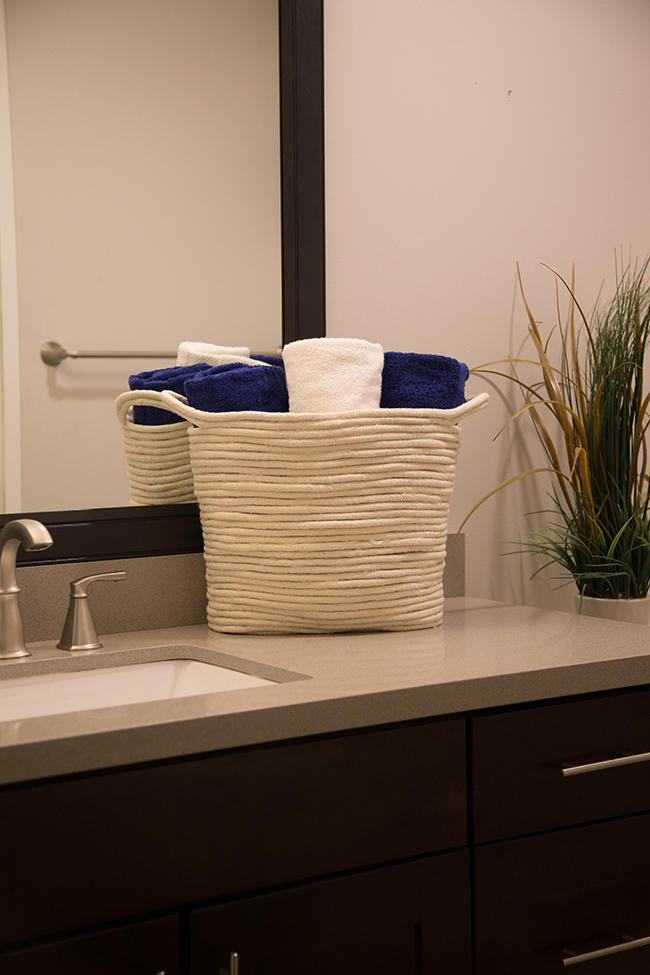
Rope basket

It's just like that basket you fell in love with in that cute boutique. Only better, because you made it yourself.

Supplies

  • Scissors
  • Glue sticks
  • Cotton piping
  • Hot glue gun
  • Bucket for the mold

Instructions

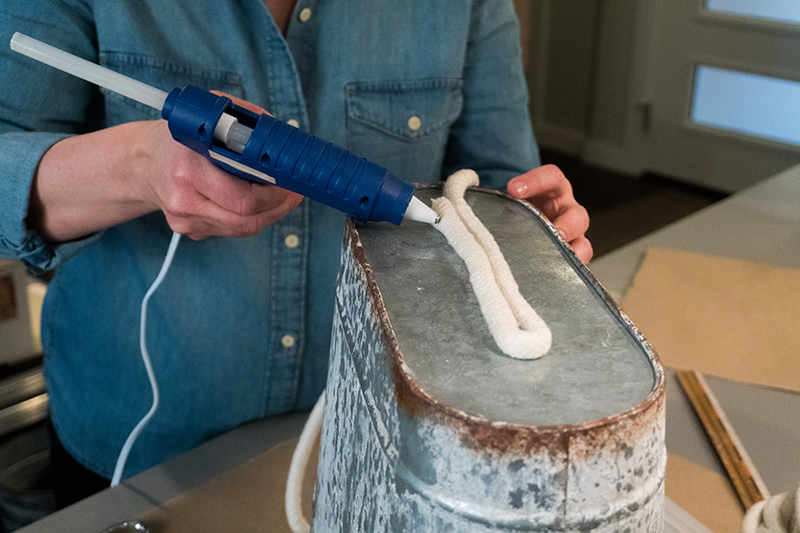
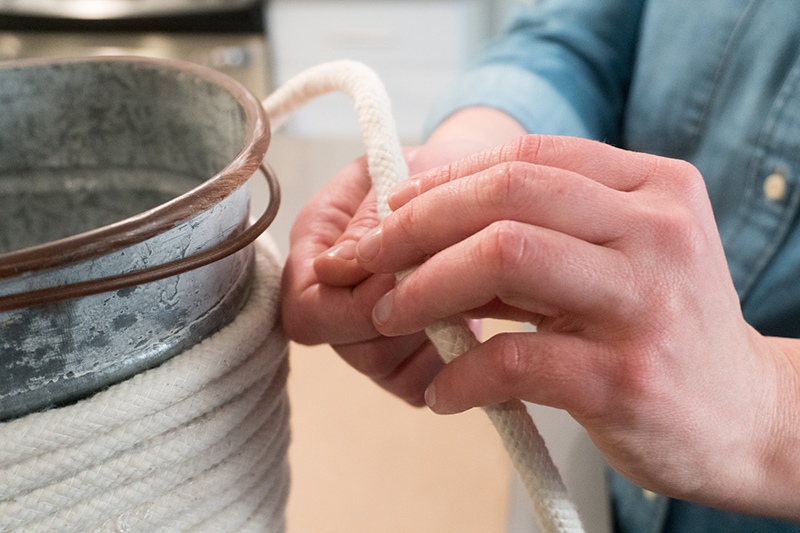
  1. Flip the bucket upside down. Then, apply a thin layer of glue to a 3-inch section of the piping and begin to wind more piping around it. Use the bottom of the bucket as a guide. Coil and glue the rope every few inches, until the base of your basket is a little bigger than the bottom of the bucket. (Note: Make sure you're gluing the piping to other sections of piping, not to the bucket!)
  2. Turn the bucket over. Continue to wrap and glue the piping until the basket is two rows short of the top of the bucket.
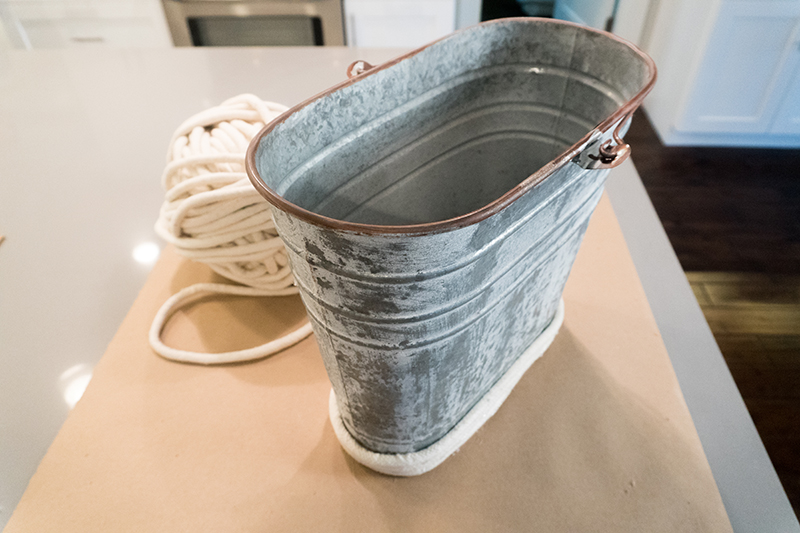
  3. Cut the rope and glue down the ends for handles.
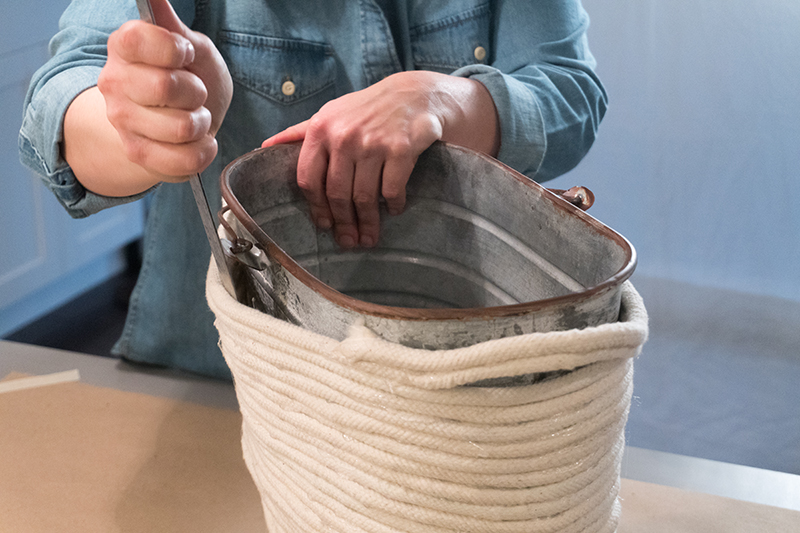
  4. Remove the bucket carefully. If it sticks to the piping, try sliding something thin and sturdy, such as a butter knife, inside to separate the rope basket from the bucket.
  5. Fill your basket (and brag about how you made it yourself)!

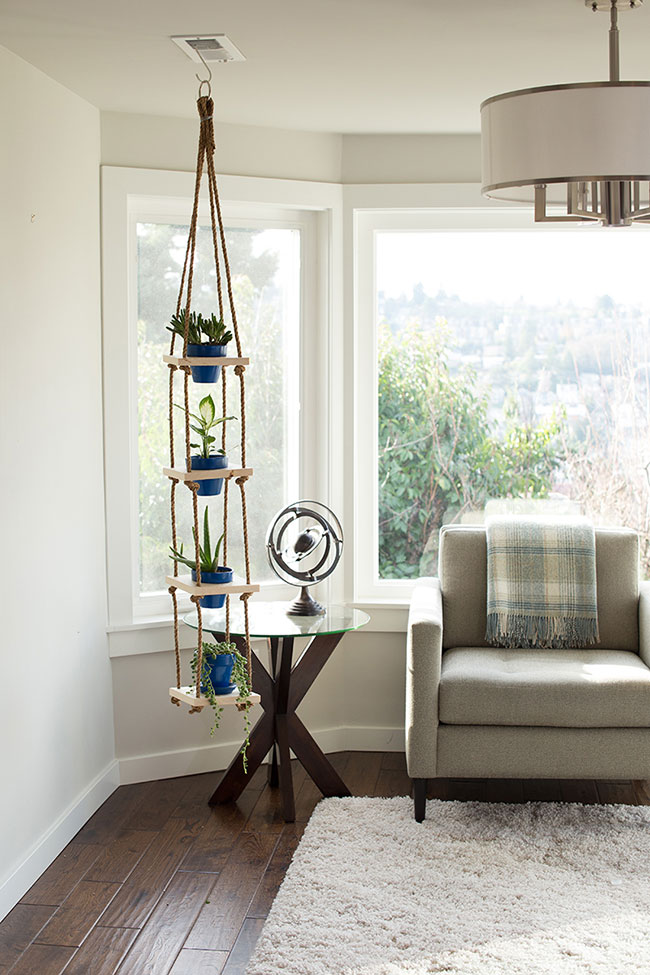
Hanging rope planter

Low on space but big on greenery? This project is a game-changer.

Supplies

  • Drill
  • 3/8-inch drill bit
  • 4-inch circular protractor
  • Tape measure or ruler
  • Jigsaw
  • Pencil
  • Scissors
  • Masking tape
  • 4 plants  
  • Plant wire
  • Extra-strong glue, such as Super Glue
  • 4 boards, each measuring 7 1/4 inches by 7 1/4 inches by 3/4 inches
  • 4 coffee filters
  • 4-inch metal ring
  • Fine grit sandpaper
  • 4 terra-cotta pots, each 4 inches in diameter
  • 1 terra-cotta saucer
  • 4 strands of 3/8-inch jute or manilla rope, each 8 feet long  

Instructions

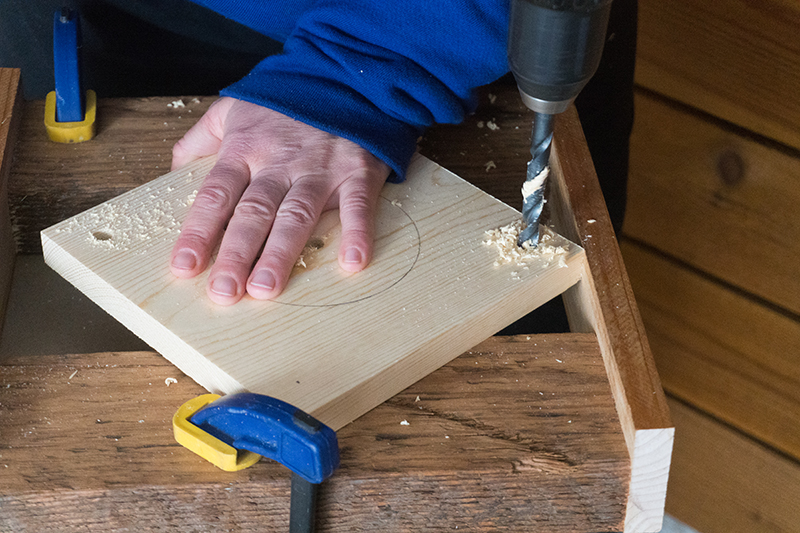
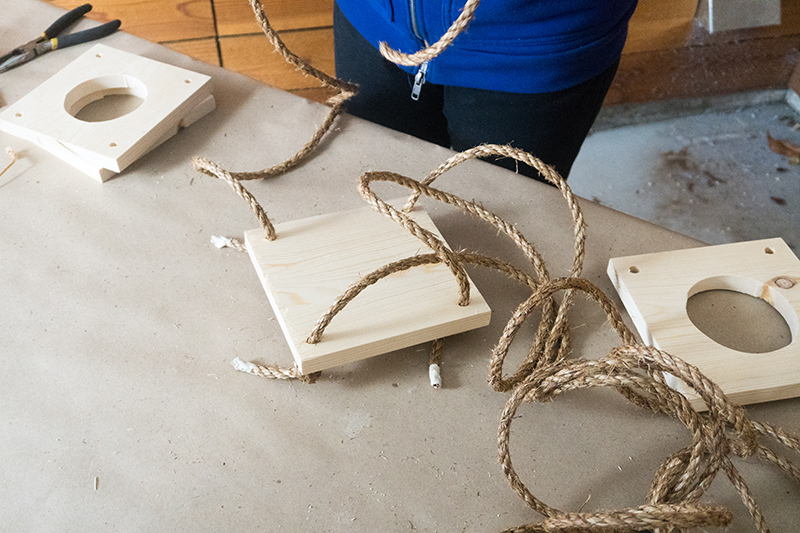
  1. Mark the center point on three pieces of wood. From that point, use the protractor to draw a circle.
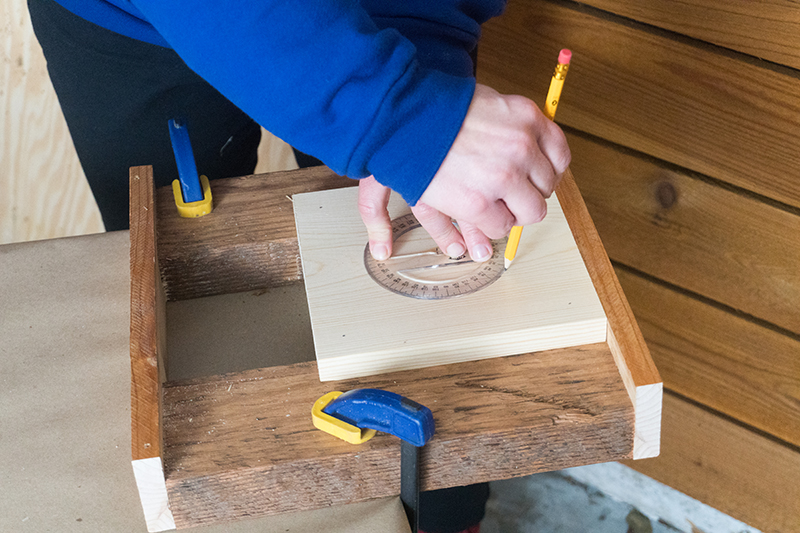
  2. Mark the corners on all four pieces of wood to create a drilling point that's 3/4 inch from each edge. Drill a hole in each corner and one in the center point.
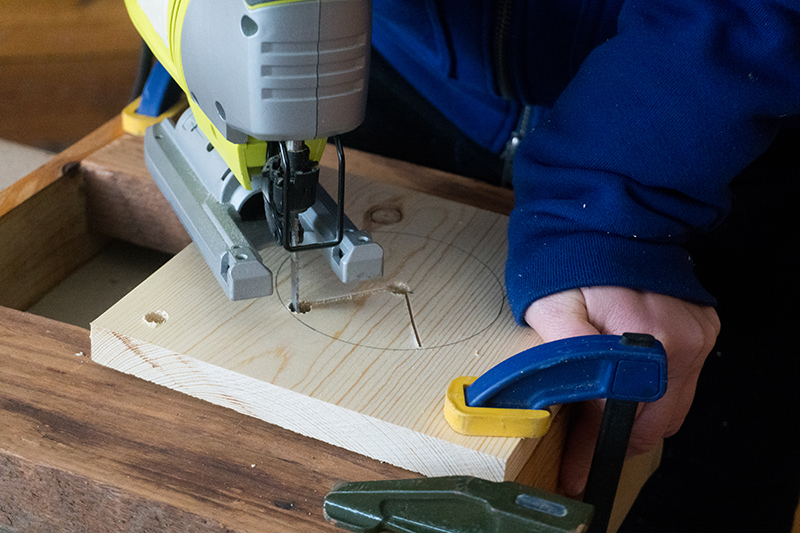
  3. Using the jigsaw, cut a path from the center hole to the edge of the circle. Follow the curve of the circle to carve it out. Repeat on two other boards.
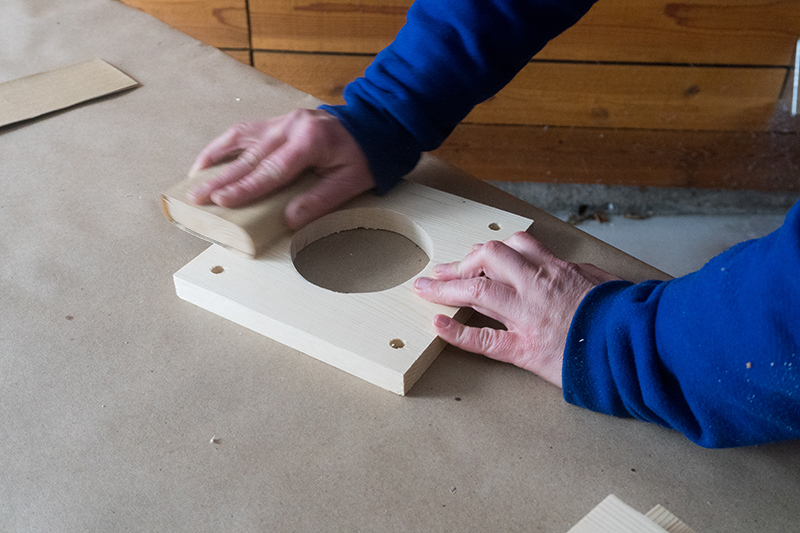
  4. Sand the boards to remove any splinters.
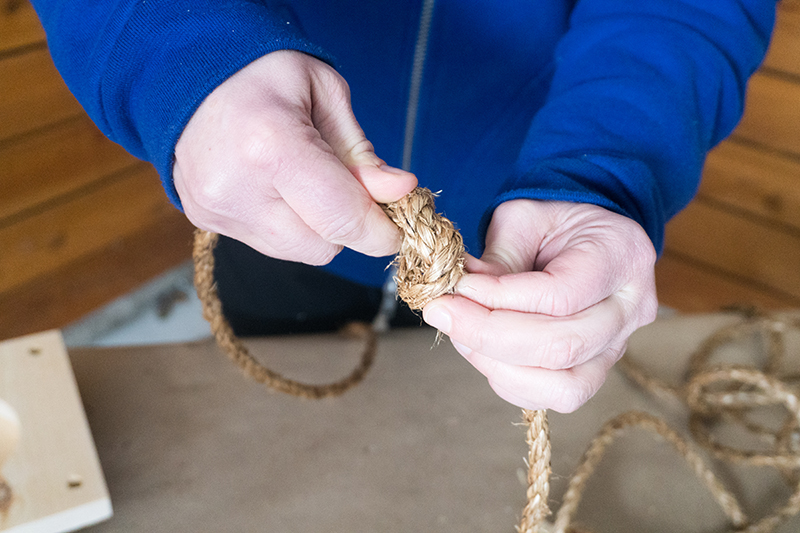
  5. Wrap tape around the ends of the rope to keep it from fraying.
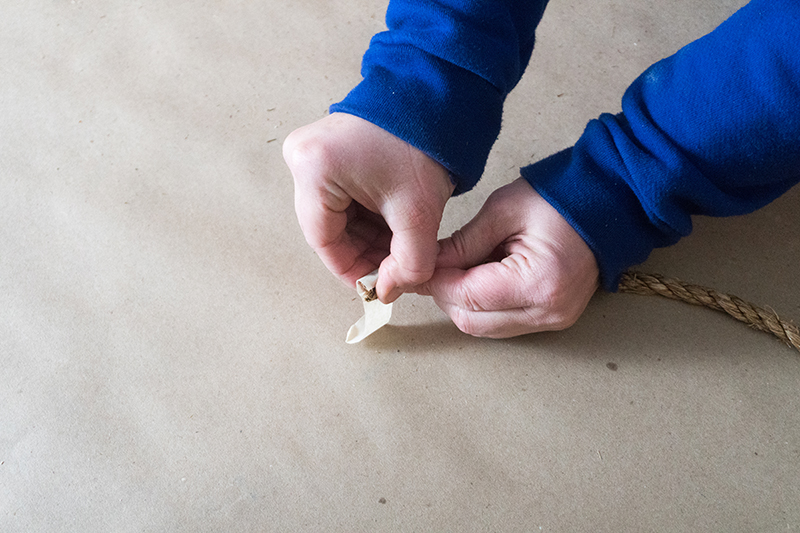
  6. Knot the bottom of each rope.
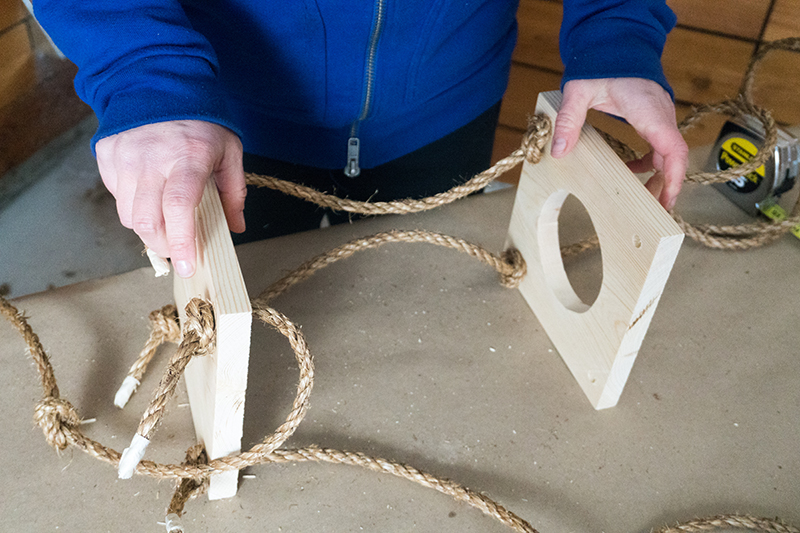
  7. Thread the ropes through the corner holes of the plank of wood that doesn’t have a center hole. This will be the bottom board.
  8. Now it's time to make a second knot in the rope. Measure 12 inches from the plank of wood and tie a knot. Repeat this step for the other three pieces of rope.
  9. Thread the ropes through the drilled holes in another board and slide the wood down until it rests on the knots.
  10. Repeat steps 8 and 9 with the remaining pieces of wood.
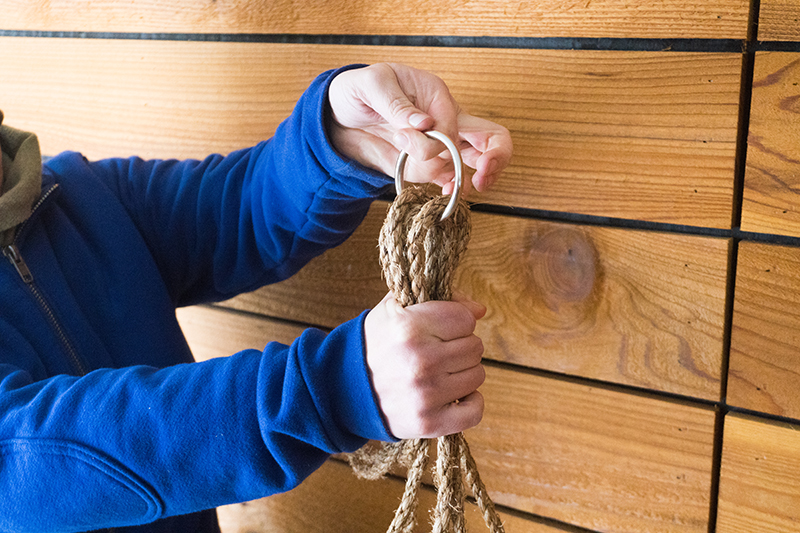
  11. Gather the four loose strands of rope at the top, push them through the metal ring and fold them over. Wrap plant wire around the ring to hold the rope together. 
  12. Glue a saucer to the bottom plank of wood. This will catch any falling water droplets. Now, hang your planter!
  13. Pot your plants and pour them a nice cold drink. And maybe have one yourself, too.


Related:


via Zillow Porchlight http://ift.tt/2ov9mGY

Thursday, February 22, 2018

5 Home Staging Tips From an Expert Flipper

You updated the plumbing, refinished the flooring, painted the walls. In short, your home renovation is finally finished, and you’re ready to put your flipped house on the market.

But before you do, follow these five home staging tricks that top house flippers use - if you do, you'll likely see a quick full-offer sale coming your way!

Offer great curb appeal

Pulling up to their potential new home should be a joyful experience for buyers. Give them the great first impression they’re hoping for with curb appeal that conveys a genuinely warm welcome.

Stylish house numbers, updated porch lighting, a classy door color, charming outdoor seating, flowers in bloom, and a welcome mat seem like unimportant details, but they make all the difference.

When a house looks cared for on the outside, it lets buyers know the inside has been maintained, too.

Create ambiance

Once potential buyers step inside, give them a personal, emotional connection to the house. Remember to address all five senses:

  • Sight. Use flattering lighting throughout the house to brighten dark corners and create playful shadows. This includes canned lighting, floor and table lamps, hanging pendants, and under-counter spot lights.
  • Smell. Create a very subtle, pleasant scent throughout the house by lighting scented candles or plugging in an aromatherapy diffuser. Citrus, vanilla, and lavender are perfect choices. Make sure the smell is subtle, not overbearing.
  • Touch. Incorporate texture through textiles that entice touching, which promotes a personal connection to a space.
  • Sound. Turn on quiet music, hang wind chimes, or install a water feature to relax anyone touring the house.
  • Taste. It never hurts to have some cookies or a candy bowl ready! Also be sure to offer chilled bottled water.

By appeasing the five senses, you’re sure to help potential buyers connect to the house.

Embrace floor space

If there’s one thing every buyer is looking for, it's square footage. Play up every inch of it for them!

To make the house feel spacious, put breathing room around monochromatic furniture, and hang mirrors to reflect windows and room openings. Hang drapes high (or don't use them at all), place large artwork on the walls, and lay down oversized area rugs.

Choose furniture raised up on legs to create a sense of lightness, and use decorative knickknacks sparingly to increase surface space. Create a distant focal point, such as a plant at the top of the stairs or a beautiful pendant light at the end of a hallway.

Emphasize architectural details

Even if your house flip includes some quirky architectural details, it's best to show them off rather than try to hide them. After all, a house's personality is part of its charm.

For example, if there’s seemingly wasted space underneath a staircase, turn it into a reading nook. If there’s a giant fireplace, dress up the mantle and arrange furniture around it. Built-ins have a special place in everyone's heart, so if your house has them, definitely show them off!

Play up a lifestyle

Remember, you're not just selling a house, you're selling a lifestyle. This means you shouldn't forget to dress up the outside areas, such as the patio and backyard. If you want your buyers to feel at home, set up an outdoor dining scene, arrange lounge chairs around the pool, or hang a rope swing.

By showing buyers the kind of life they could be enjoying, you’re showing them it’s worth paying to get it.

Check out Success Path for more tips on real estate and renovation.

Top photo from Zillow listing.

Related:

Note: The views and opinions expressed in this article are those of the author and do not necessarily reflect the opinion or position of Zillow.


via Zillow Porchlight http://ift.tt/2wio59Q

Tuesday, February 20, 2018

9 Listing Photo Do's and Don'ts

Your bags are packed, you’re ready to move and the last thing you want to do is follow your agent’s advice about putting time and money into your listing photos. But if you don’t, your photos could prevent the home from selling quickly.

Consider these nine do’s and don’ts to help your listing attract the attention it deserves.

1. Do: Take a shot from the curb.

Keep your home’s curb appeal top of mind. Buyers often decide in a matter of minutes (or seconds) whether they want to keep looking or move on to another listing.

Make sure you get the whole house in the shot, and don’t let cars or other objects block your line of sight.

Don’t: Create a landslide.

When taking a shot from the curb, be mindful of your camera’s angle. The roofline should be parallel with the photo’s frame to make it look level - not like there’s a landslide on the property.

2. Do: Welcome visitors.

An attractive front door and entryway go a long way in setting the tone for the rest of your home. Leaving the door open in one of your photos can also send a welcoming message.

Don’t: Threaten visitors.

Remove any threatening signs or barriers on the property before taking photos. The goal is to create a feeling of warmth with your listing photos - not scare onlookers away.

3. Do: Consider a bird’s-eye view.

Taking a photo from above is a great way to show off a large property or a waterfront location. Crop the photo close enough so the home is visible without having to draw an arrow or a box around it.

Don’t: Consider a fisheye lens.

Some folks use a fisheye lens to make smaller spaces appear larger. However, it often has the opposite effect, making the space feel smaller and distorted.

As a general rule of thumb, stick with a traditional lens for listing photos, and make small spaces appear bigger with design tricks.

4. Do: Capture your home’s selling points.

You may think it’s best to skip the bathroom when taking listing photos, but if yours was recently updated, show it off! Bathrooms are among the first spaces to be upgraded in newly owned homes, and research shows that blue bathrooms sell for more than expected.

Don’t: Capture yourself in the mirror.

While a vanity can be a selling point, you want buyers to picture themselves in the mirror - not you. Stay out of your listing photos by avoiding angles where you or your camera’s flash may be reflected.

5. Do: Stage each room.

The goal is to put your home’s best foot forward. That means staging each room to sell shoppers on the lifestyle your home offers. Create cozy vignettes in each photo so it’s easier for shoppers to envision themselves living there.

Don’t: Stage a mess.

If there’s one absolute “don’t” for listing photos, it’s capturing a mess. Tidy up each room before taking any photos so your home looks its best.

6. Do: Play up the season.

Even if your home has been on the market for a while, it will feel up-to-date if the photos reflect the season. If it’s summer, take a sunny photo of the backyard. If it’s winter, create a cozy feel with a fire and a warm blanket.

Don’t: Play up your holiday decor.

Over-the-top holiday decor can be a turnoff, especially if buyers don’t celebrate that holiday. Instead, consider ways to decorate for the season as a whole and take photos of rooms without themed decor.

7. Do: Show off the view.

If the view is one of your home’s selling points, you’ll definitely want to show it off. It’s best if you can capture it with a part of the house in the shot, like the deck or porch. That way, buyers can picture themselves there.

Don’t: Show off your pets.

Focus on the parts of your home that will be there when a buyer moves in. Unfortunately, your pets don’t fall into that category, as cute as they are!

8. Do: Show off architectural details.

Archways, beams and other architectural quirks may be hard to photograph, but they give your home character. Try to capture a few of the architectural details if you can.

Don’t: Show off architectural blunders.

Every home has its blemishes, but that doesn’t mean you have to capture them all in the photos. The listing is the time to put your best foot forward - the open house and inspection are when the buyer can take note of the imperfections.

You may also want to consider making a few small improvements, like updating the bathroom, before listing your home.

9. Do: Take a night shot with the lights on.

While it’s easy to assume daytime shots are ideal, a nighttime exterior shot can create the right amount of contrast to make your photos stand out. The key is to leave your home’s interior and exterior lights on while you take the photo.

Don’t: Capture a dark room.

When it comes to interior photos, you want all the light you can get. Use lamps and daytime window light to make your photos as bright as possible while still looking natural.

Related: 


via Zillow Porchlight http://ift.tt/2sIoHJ0

Wednesday, February 7, 2018

4 Things to Do Before Gutting a Home

Do you have a bit of a fixer upper on your hands? Or maybe you're just ready for a major change? Remodeling your home can be a lot of work, but the results, when done well, are well worth it.

Before you get too excited and start tearing down walls and ripping up the floors, read through this guide to keep yourself on track.

Check the space allocation

Having enough space, especially in bathrooms and kitchens, can make or break a home. You can install gorgeous flooring, countertops and fixtures, but if your knees touch the wall or the bathtub when you're sitting on the toilet, the amenities won't make up for it. And if you forget to take large kitchen appliances into consideration, you can end up with a cramped space that only looked great on paper.

Before you gut the house and start moving walls, take the time to triple check your measurements.

Draw out your space with accurate measurements of desired appliances included before you change a wall or buy a tub. Make sure there is enough room for doors to open and close with ease. Ideally, you should be able to open your cabinet door and your oven door at the same time.

Remember - it's easier and less expensive to make changes before you buy new appliances or knock down a wall.

Inspect the structure and foundation

Before you start gutting a home, look for problems that may be hidden beneath the surface. You don't want to spend a lot of money on new flooring, for example, only to have to rip it out to deal with structure or foundation problems.

Put simply, fixing structural problems is hard, expensive, and requires knowledge and experience that the average new flipper or homeowner doesn't have. Attempting to minimize costs via DIY efforts can lead to mistakes that make the process even more expensive and difficult.

This step is particularly important if your home (whether it's a new-to-you fixer upper or a house you've owned for years) has recently gone through heavy rain or flooding, natural disasters, or pest problems.

Shop around for professionals

Don't wait until you need a professional ASAP before shopping around - you'll quickly find yourself at the mercy of whoever is available with marginally good reviews. Before you start your remodel, do your due diligence and find professionals who fit your budget and project needs. You'll thank yourself in the long run.

It's a good idea to find an electrician and plumber before you start your project. While you can probably learn how to handle small projects like installing an outlet, you'll need help before your remodel is through. Unless you have a lot of experience, you shouldn't tackle extensive electrical or plumbing fixes on your own.

A trusted home inspector is also a must-have. Here's a tip: Find an inspector who is used to houses similar to yours in age, design and location. They'll be familiar with common problems others may miss.

And don't just read the report at the end. If possible, walk through the home with the inspector. You'll learn more and have the opportunity to ask questions as they come up.

Know what sells houses in your area

If you're remodeling your house in order to sell it, invest in changes that will help sell the house and increase the sale price. Don't waste your money on updates that don't give you a good return on your investment.

Do your research. Talk to real estate agents in the area or tour houses in your neighborhood that are for sale. Do buyers looking in the area prioritize large windows or large bathrooms? Do they buy based on roof condition or flooring? Once you identify the factors that help houses in the area sell, build your budget accordingly.

This doesn't mean you can cut corners. Unless a buyer is looking to flip a home, they'll expect the whole house to be up to a certain standard. However, if you have to pick between hardwood floors and top-of-the-line kitchen equipment, it's good to know which one will be more likely to lead to a profitable sale.

Related:


via Zillow Porchlight http://ift.tt/2C1ymcW

Tuesday, February 6, 2018

U.S. Homeowners Spend $15,000 in Hidden Costs to Sell a House

Selling a home not only takes time, but also costs money. To help with budgeting, Zillow and Thumbtack identified several common - but often overlooked - seller expenses.

From closing costs to home prep projects like carpet cleaning, U.S. homeowners can expect to spend more than $15,000 on these extra or hidden costs to sell the median home, according to Zillow and Thumbtack's Hidden Costs of Selling Analysis.

Closing costs

The two largest closing costs are agent commissions and, in most states, sales or transfer taxes.

Nationally, sellers spend $12,532 for both closing costs on the median home. Sellers should also prepare for a variety of other smaller closing costs, including title insurance and escrow fees.

Home prep costs

Most sellers will complete at least one home improvement project before listing.

While some sellers prefer to complete these projects themselves, those who outsource can expect to spend more than $2,650 nationally to cover staging, carpet cleaning, interior painting, lawn care and house cleaning - five of the most popular seller home prep projects.

Location, location, location

As with all things real estate, these extra costs can vary significantly by region.

In San Francisco, homeowners can pay more than $55,000 on the median home to cover these combined closing costs and maintenance expenses - the highest among the markets analyzed.

Compare that to Cleveland, OH where home sellers pay just over $10,000 for the same costs.

Estimating profit

Even though selling a home costs money, most (73 percent) of sellers are still satisfied with the transaction, according to the Zillow Group Report on Consumer Housing Trends.

To estimate potential profit, sellers who have claimed their home on Zillow can use Zillow's Sale Proceeds Calculator. It factors in the home's sale price, mortgage balance and agent commissions, along with other common seller fees.

Curious how your metro stacks up for sellers? Here’s a breakdown of the metros analyzed in the report:

Looking for more information about selling your home? Check out our Sellers Guide.

Related:


via Zillow Porchlight http://ift.tt/2qu4jbv