Tuesday, March 24, 2020

How to Install a Kitchen Faucet

If you’ve been washing your hands a lot lately, you might have started paying extra attention to your faucet. Does it drip? Is the chrome flaking off? Is it dated?

Plumbing projects can be intimidating, because no one wants to accidentally flood their entire home. But installing a new kitchen faucet truly is a DIY that anyone can handle.

As long as you work slowly and follow the directions, you can add a beautiful faucet to your kitchen with zero emergency calls to the plumber.

Supplies:

  • New kitchen faucet (and the installation manual)
  • Adjustable wrench
  • Flashlight
  • Bucket
  • Rags
  • Cleaner
  • Screwdriver
  • Towels
  • Teflon tape (optional)

Before purchasing a new faucet, take note of your current setup. Look under the sink to see how many holes yours has (usually between one and four).

This determines the type of faucet that will work with your sink. A single-hole faucet can be installed in a three- or four-hole sink by adding a deck plate, but not vice versa.

Step 1

Remove everything from under your sink. This DIY takes place in tight quarters, so you want to make it as roomy as possible. Also, be sure to keep a towel nearby for any water drips.
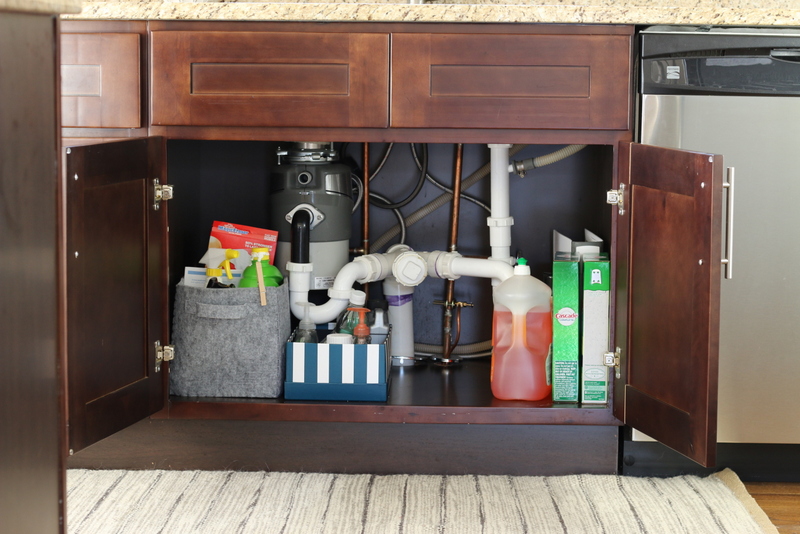
full_cabinet


Step 2

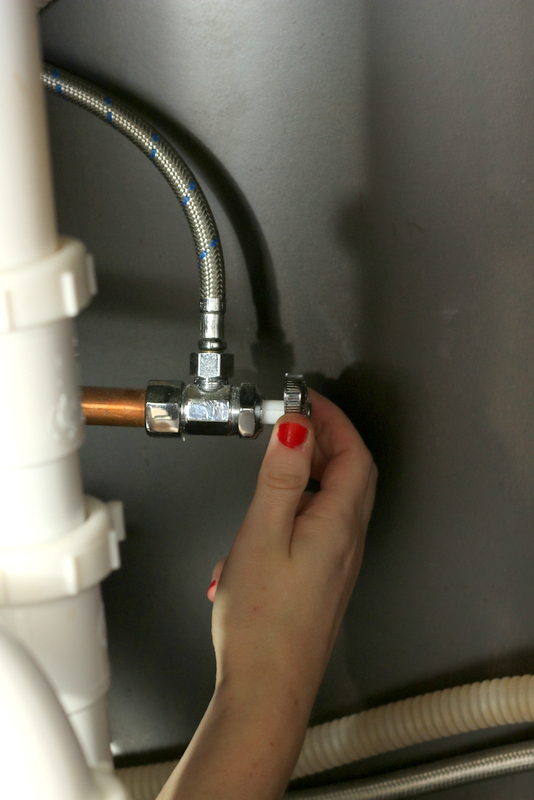
Turn off the water supply lines to the kitchen faucet. There will be a cold water and hot water valve underneath your kitchen sink.

Turn each of these water valves clockwise until you can't turn them anymore. Then turn on your faucet and make sure water doesn't come out.

Keep the faucet in the "on" position to relieve any water pressure.
water_turnoff

Step 3

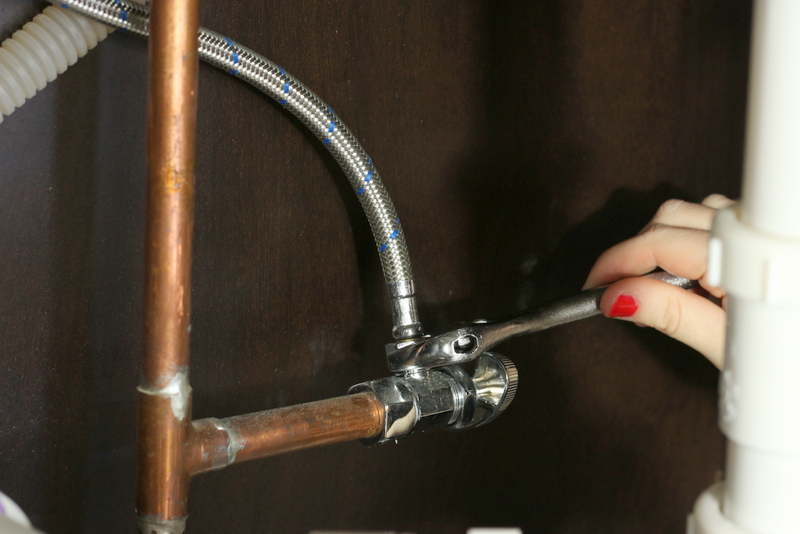
Now that the water is safely off, you can unhook the hot and cold water supply lines. You will need a wrench for this step. Simply loosen them (counterclockwise) until they unhook.

A little water may drip out, which is totally normal. Just keep your bucket and rags handy.
unhook_water_line

Step 4

Unscrew your old kitchen faucet from underneath the sink.

Every faucet is different, so yours may look a bit different than this one. Ours had a gold ring that we just had to loosen with our hands. Others might be connected with a nut. If that’s the case, you'll have to use your wrench again.
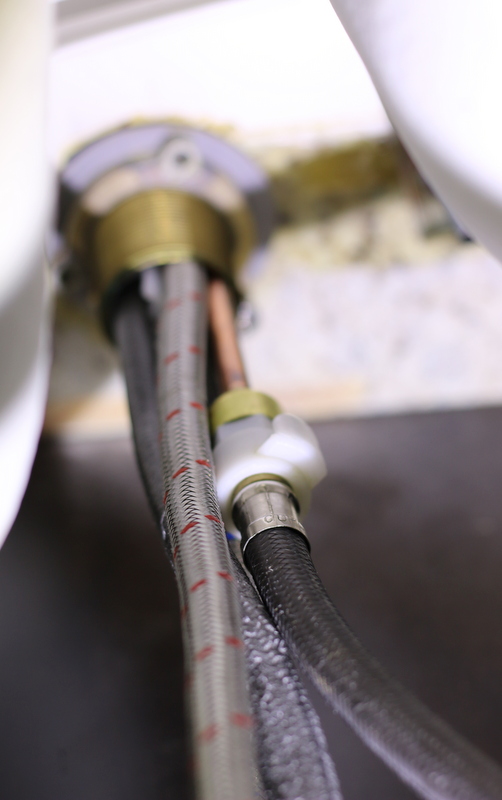
unscrew_faucet

Step 5

Pull your old faucet through the top of the kitchen sink and out.
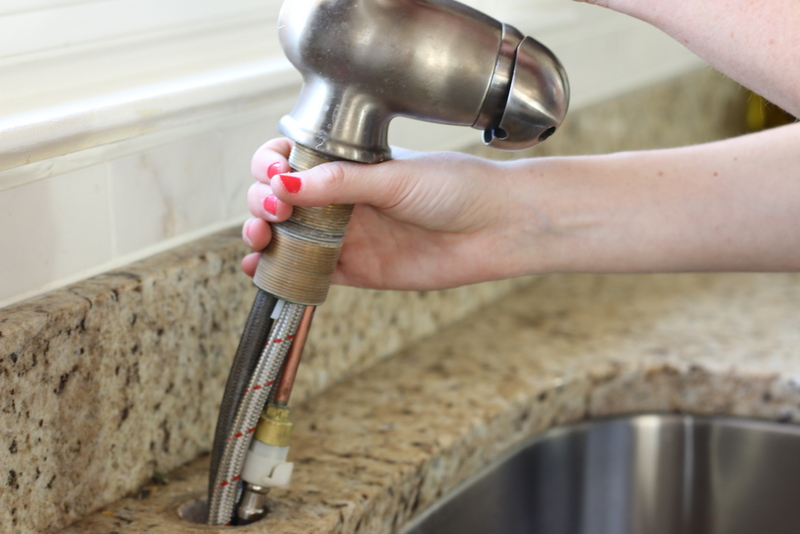
remove_old_faucet

Step 6

Clean up any gross residue that was hiding underneath your old kitchen faucet with your towel. This is the time to get it nice and clean, so put some muscle into it!

Step 7

Grab the manual for your new faucet, because you're going to need it! Since every faucet is different, they all come with their own set of directions. But we'll walk you through the general steps.

Feed your new kitchen faucet into the hole at the top of your sink. You may want to enlist a buddy to help keep the top secure as you venture underneath the sink.
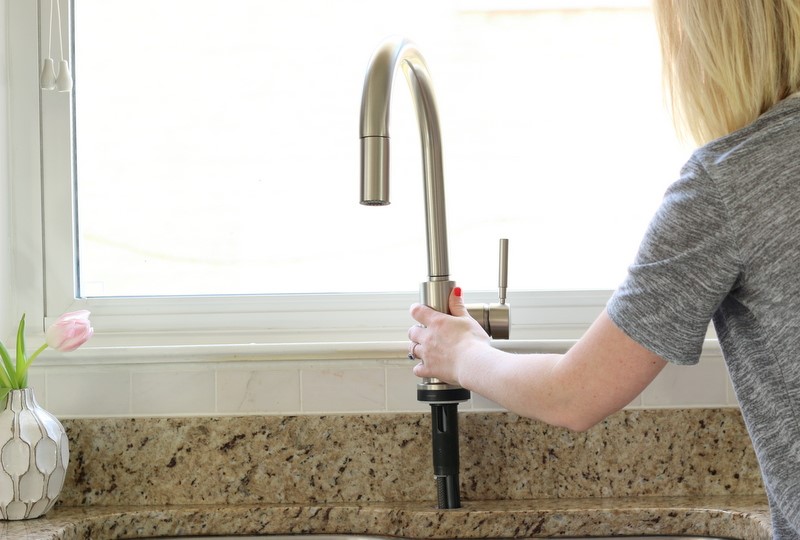
feed new faucet

Step 8

Secure your faucet from underneath the sink. Ours required tightening a few screws.
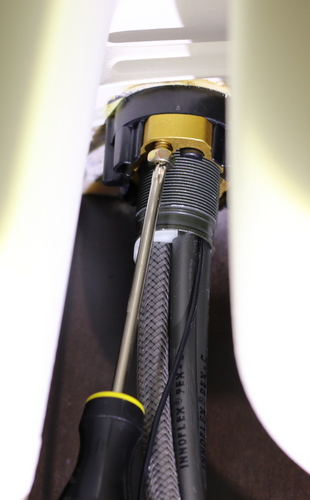
screw_new_faucet_in_tightly

Step 9

Attach your cold and hot lines to their valves, and make sure they are nice and snug with your wrench.

You may want to wrap your threaded pipes with some Teflon tape to make sure your seal is tight and your connections remain leak-free!
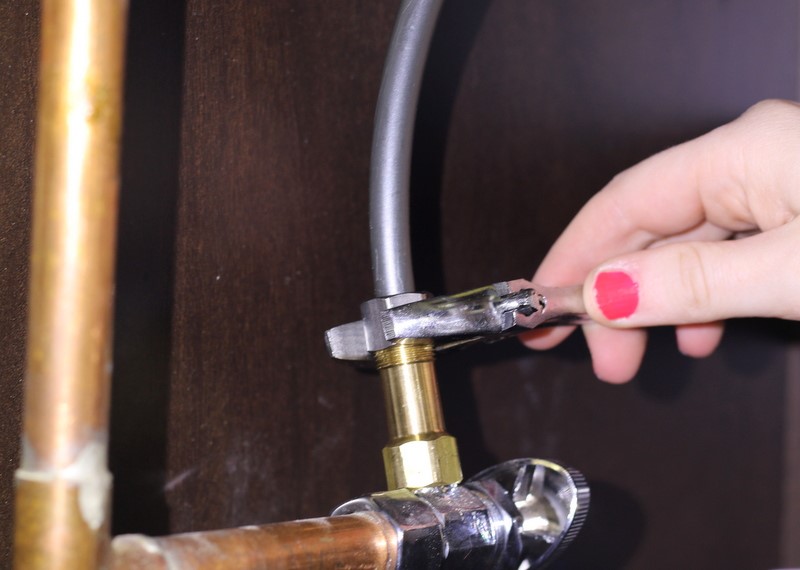
attach lines

Step 10

Turn your water supply valves on … slowly! Then check the faucet to make sure both your hot and cold water are working.
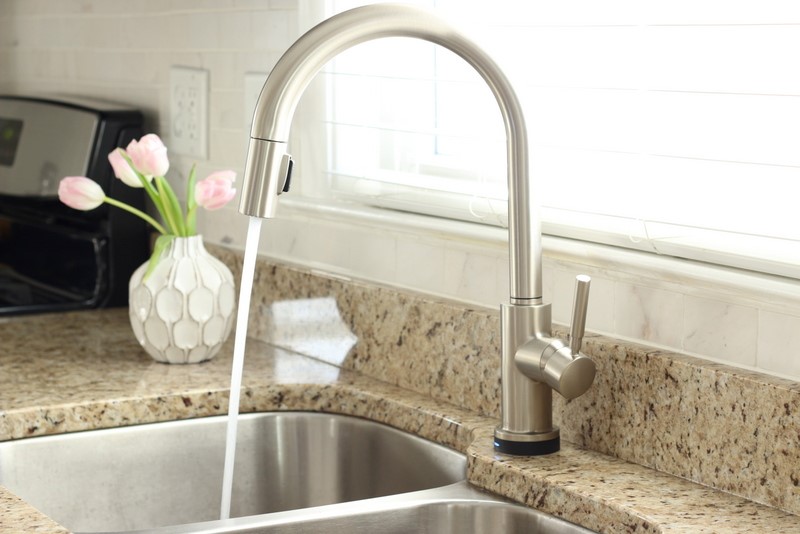
turn water on

That's it. Seriously easy, right?!

You can elevate the look of your kitchen in under an hour, and it will only cost you the price of a new faucet.

Related:


via Zillow Porchlight https://ift.tt/3alv32g

Thursday, February 27, 2020

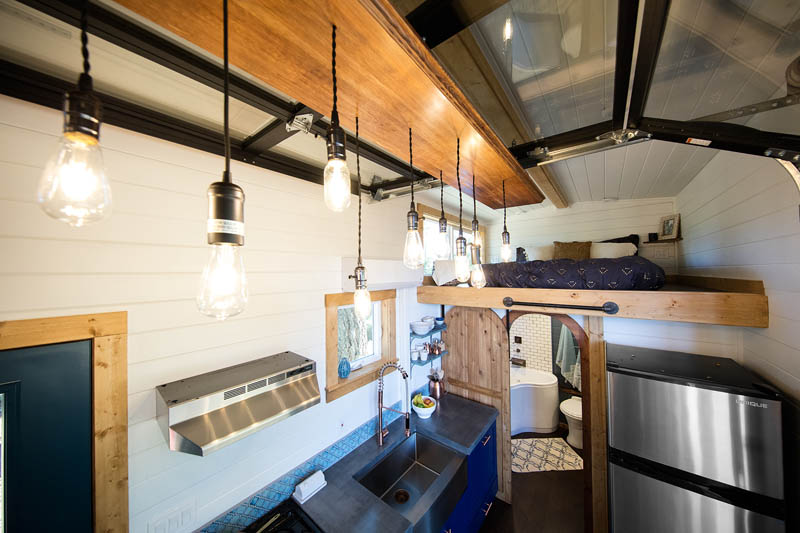
You'll Be Climbing the Walls of This Tiny Home

There's no need to park in the mountains when the rock climbing is right at your doorstep. 

At least that’s what the team at Tiny Heirloom figured when they set out to design a tiny home for an intrepid couple looking to take adventure on the road.

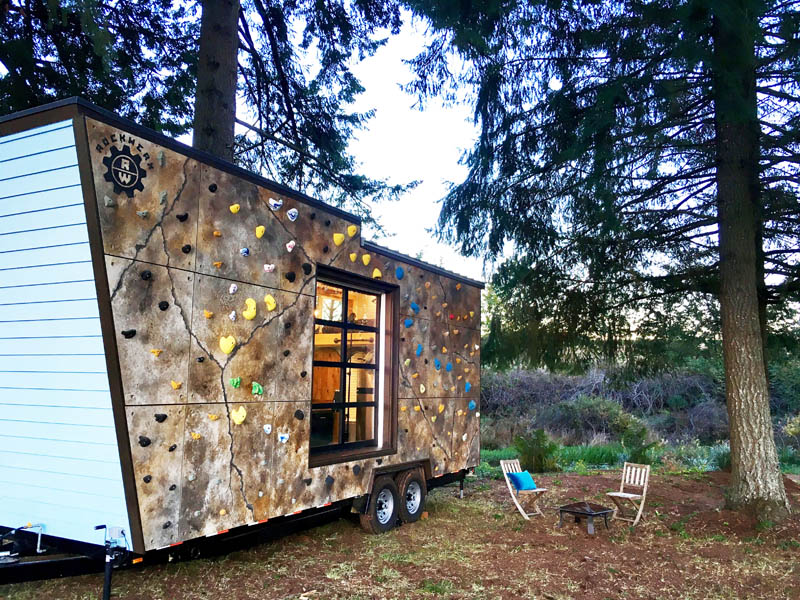
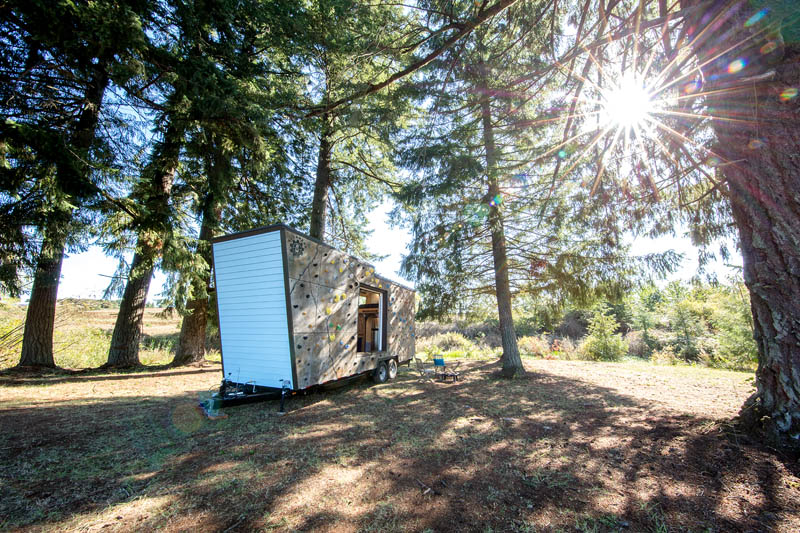
The Portland, OR-based company combined two of the things its clients enjoyed most - fitness and being outside - into a 250-square-foot, custom-built home, said Jason Francis, creative director and co-founder at Tiny Heirloom.

The idea for a tiny home with a bouldering wall came from organic brainstorming, Francis said.

"The rock wall really started as a long-shot idea, but the more we thought about it, the more excited we got," Francis said. "So we figured out a way to make it happen!"

"We've built many custom homes," Francis added, "but this was definitely one of our most unique."

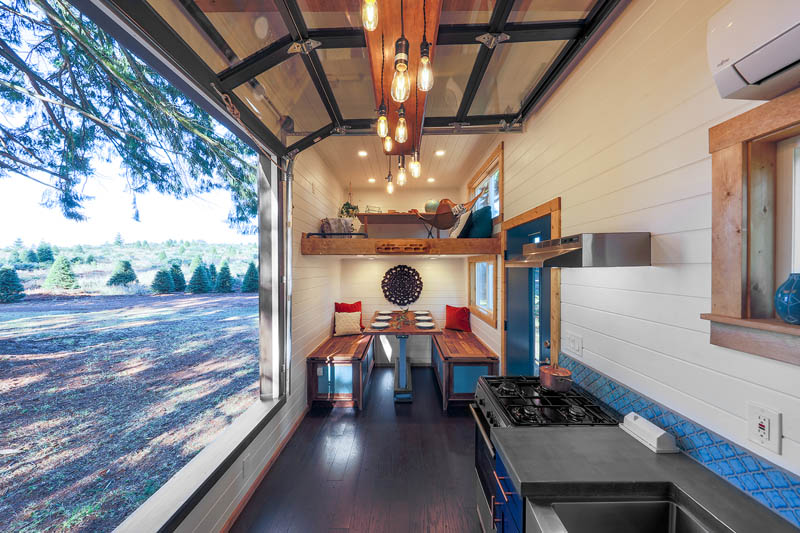
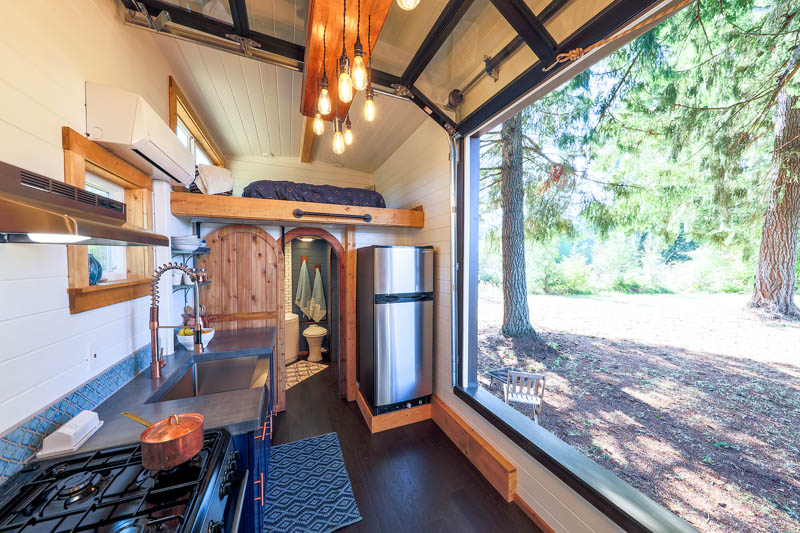
His team added some rich design elements, including a roll-up garage-style glass door, to bring the outdoors inside. The couple intends to use the place as their primary residence.

The home cost about $145,000, but $35,000 of that went to building the custom climbing wall.

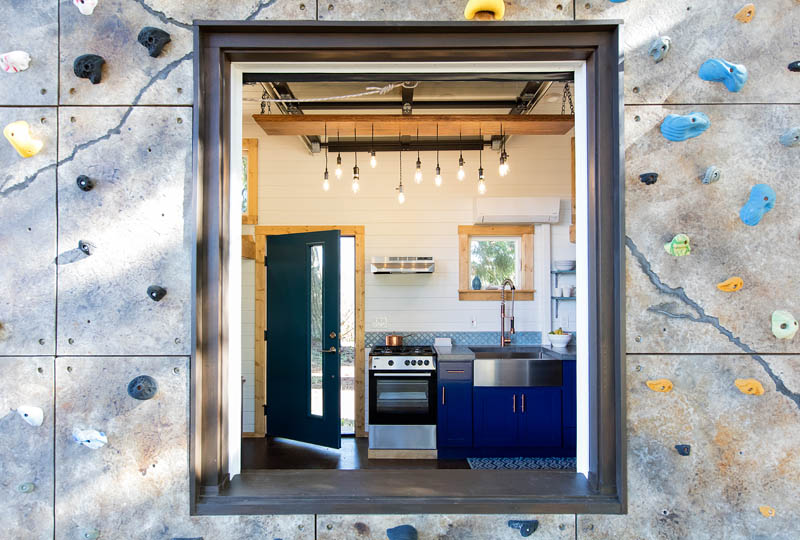
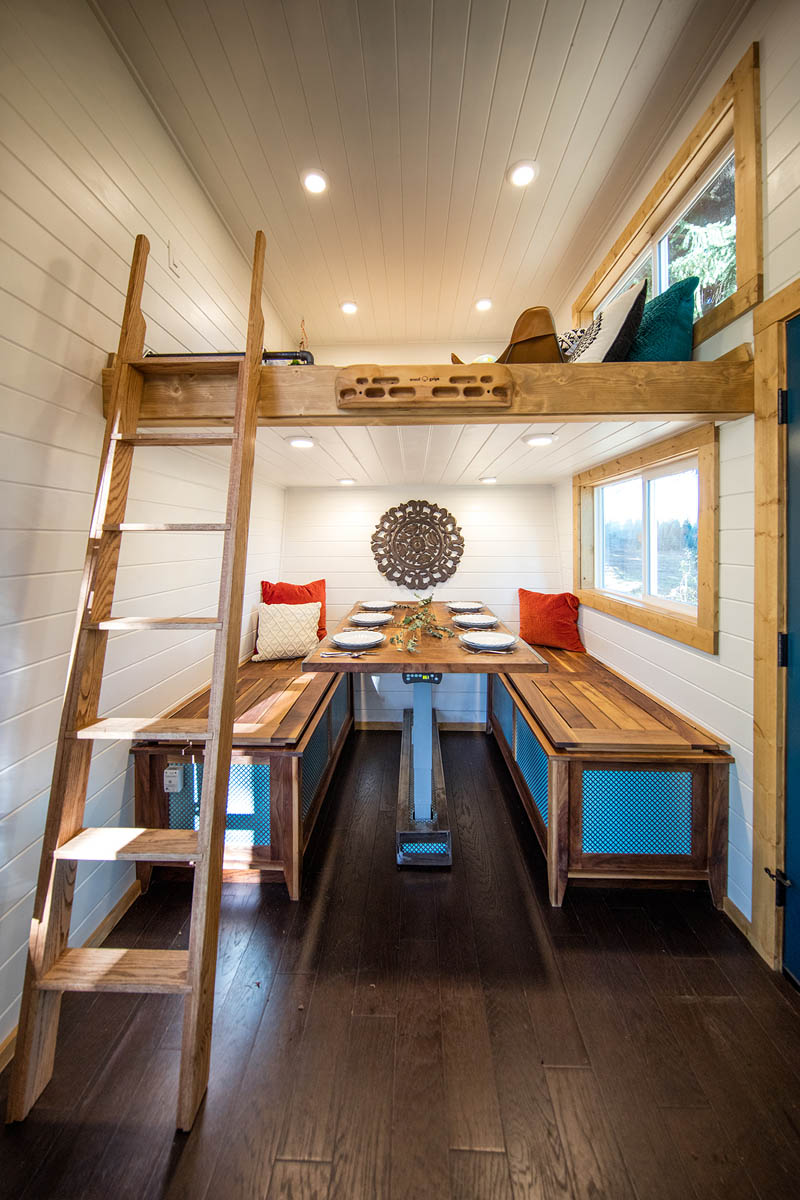
The home is 24 feet long and 13 feet tall, providing plenty of room for outdoor climbing. The bouldering wall is on one side of the home, and the handholds can be reconfigured to change up the climbing route.

One side has a traditional entryway, while the other has the roll-up door to provide expansive views of wherever the home is parked.

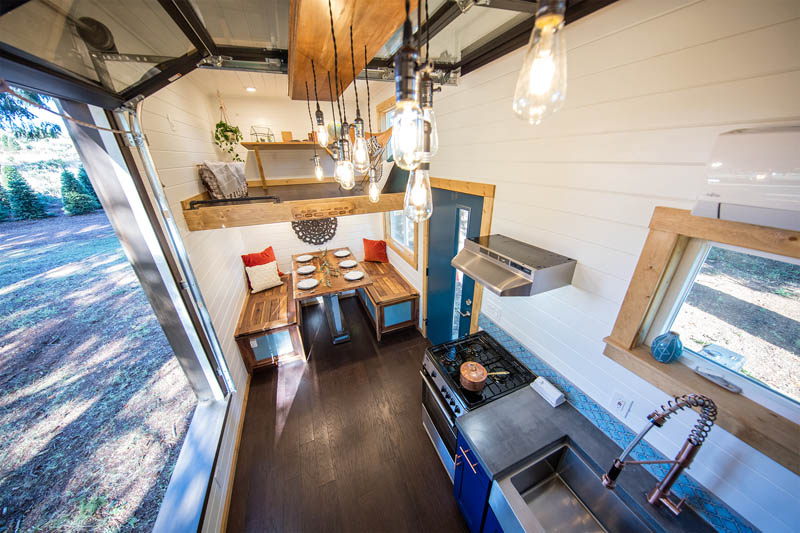
The living space contains two lofts: one with an office and the other with a bedroom. Designers hung a chandelier made of Edison bulbs between the two.

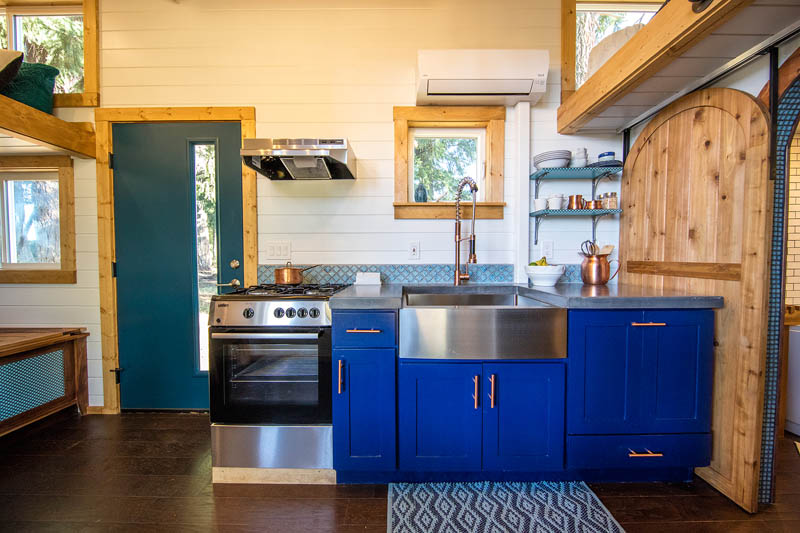
The kitchen features a farmhouse sink and full-sized oven. The cabinets are a rich blue color with brass accents. There are two open shelves above the countertops.

The home also contains a dining space with bench-style seating that doubles as storage.

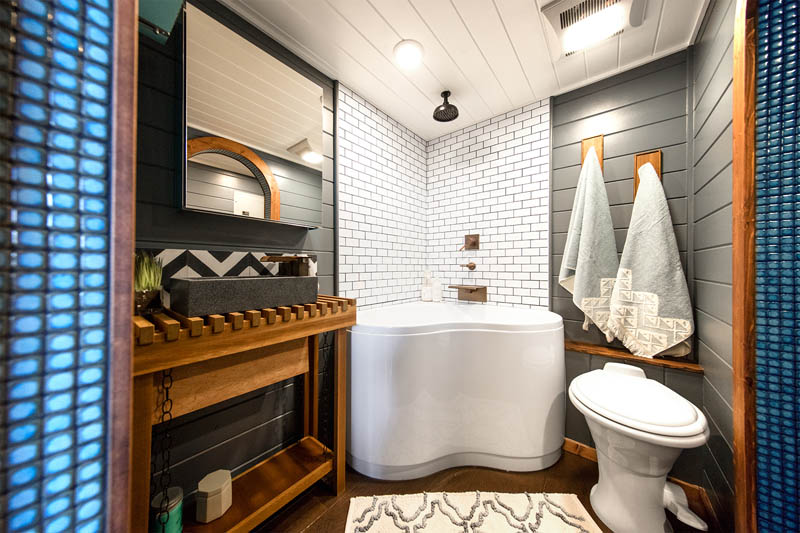
An arched blue-tile doorway leads to the bathroom, which has a full-sized soaking tub, white subway tiles and a rainfall showerhead.

After completing the tiny home and sharing it on social media, Francis said they've had a number of inquiries about building similar spaces for clients.

"Ideas have spread from it quite a bit, but no one else has bought the exact same thing," Francis said. "We have had a client request a rock wall system in the house as a way up to the lofts for his two young boys."

Photos courtesy of Tiny Heirloom.

Related:

Originally published March 2018


via Zillow Porchlight https://ift.tt/2ubskYD

Whale Watch From Any of This Home's 3 Rooftop Decks

The Olympic Mountains. The Strait of Georgia. The shoreline of Victoria, Canada. And maybe a pod of orcas, if you're lucky. You can see all of that (and much more) from one of this home's three rooftop decks.

Located on the rocky shores of San Juan Island, Washington, this coastal retreat has a unique connection to the land it occupies - the home is built directly into the hillside, so it gracefully descends the ground's natural slope.

A team of architects from Seattle-based firm Prentiss Balance Wickline worked on the design. Dan Wickline, one of the architects on the project, drew inspiration from the island's stark natural beauty.  

"Rooted into a linear ravine on the site, the spaces of the house are composed in a series of stacked volumes climbing the terrain and aimed toward specific views," Wickline says.

These specific views can be admired from one of the grassy rooftop decks, from the floor-to-ceiling windows that line the water-facing walls or from one of the rectangular window clusters.

The strategically placed clusters create the sensation of total immersion in the rugged landscape - no matter which way you turn, a view awaits.   

Inside, the design features a muted color palette inspired by the lush greens, earthy browns and serene grays of the Pacific Northwest. These subtle and somewhat restrained hues allow the home's simple, elevated aesthetic to really shine.

From every angle, the home resembles a work of art - fitting, considering it was actually designed for a painter.

The top-floor art studio overlooks the water, as does its clean, light-filled library. And if those views aren't enough to inspire creativity, there's always a rooftop deck or two nearby.

"The grass roofs establish a new landscape, which at the same time nest and blend the house into the existing terrain," Wickline says.

This delicate tug of war is a testament to the home's thoughtful design and a conflicting (yet romantic) notion: that a place perched so high above the horizon can still feel so deeply rooted in the earth.  

Photos by Eirik Johnson.

Related:

Originally published September 2018


via Zillow Porchlight https://ift.tt/2ThgANw

Friday, February 7, 2020

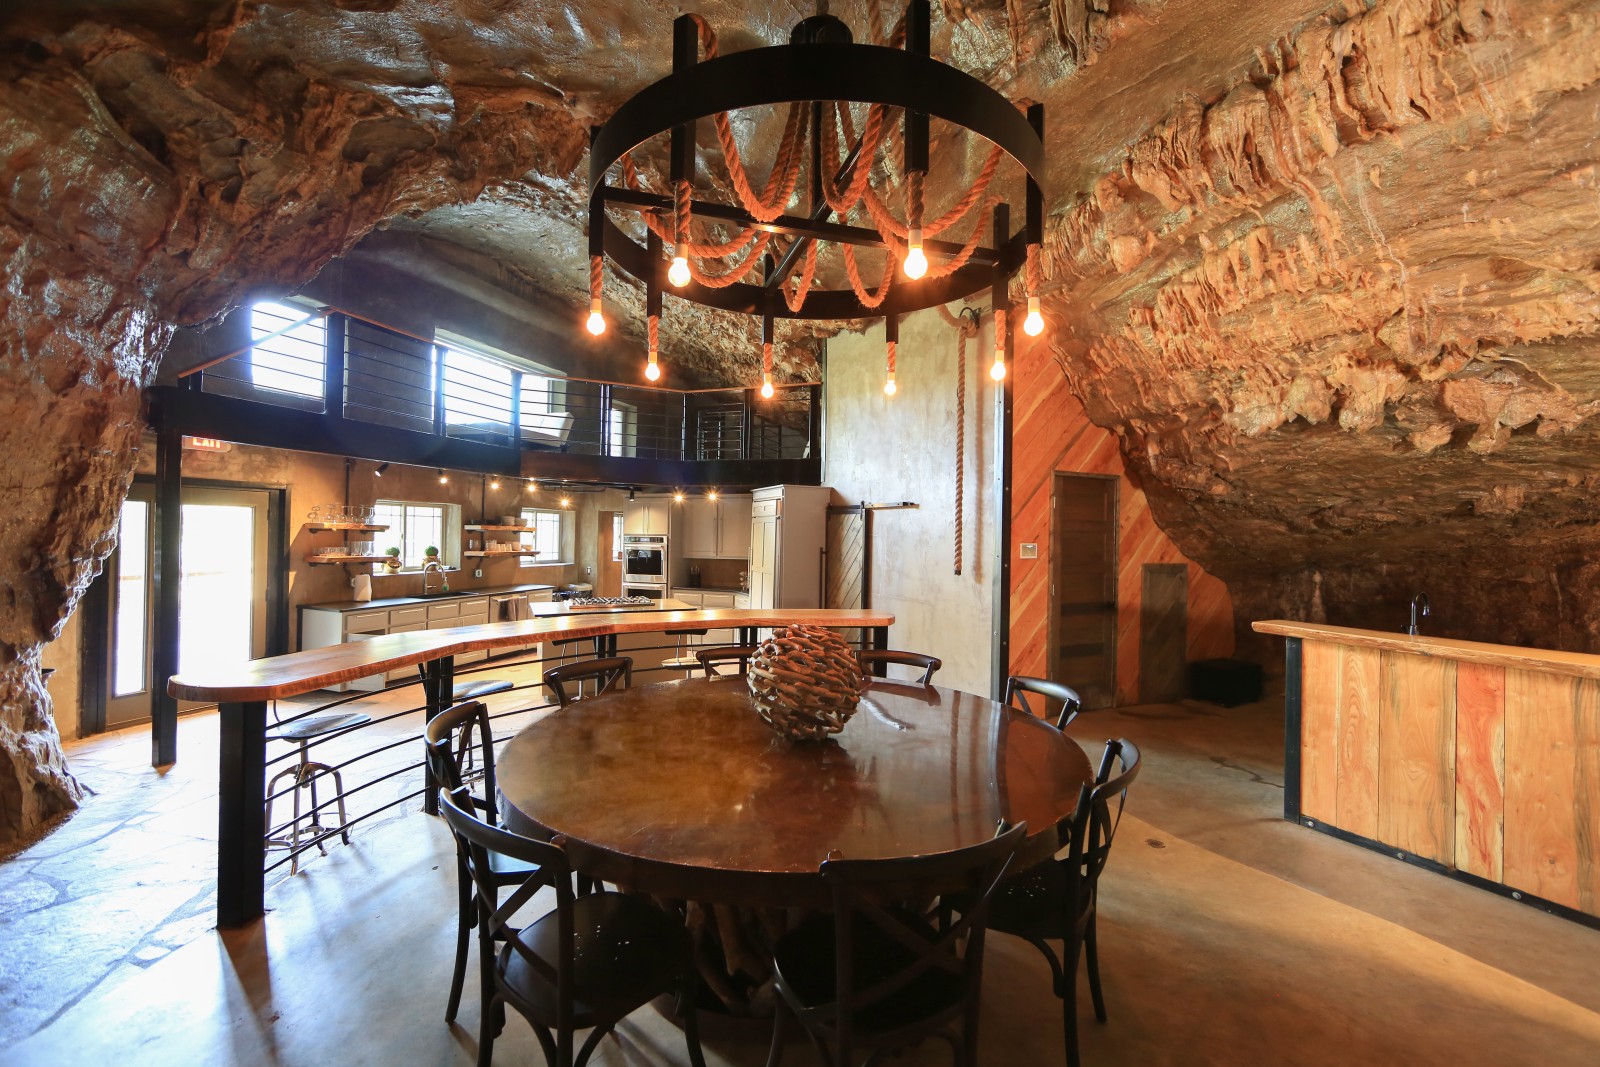
Hibernate Luxuriously in This 5,572-Square-Foot Cave Mansion

When most people envision their dream home, they describe large kitchens, beautiful hardwood floors and clawfoot tubs. But not John Hay.

In the mid-1980s, Hay - founder of the Celestial Seasonings Tea Company and great-great grandson of U.S. Secretary of State John Milton Hay - purchased the Beckham Creek Cave in Parthenon, Arkansas. He had plans to transform it into a 10,000-square-foot bomb shelter, consisting of cinder-block walls, plywood flooring, 11 coats of clear epoxy on the natural formations of the cave, and an internal freshwater spring.

He stocked it with enough freeze-dried food to keep 50 people fed for up to two years, and he twice had his religious group sit out bomb scares in the cave. By 1987, Hay realized the end of the world wasn't coming quite so soon. Various records indicate the property was sold to a man known simply as "Mr. Richardson," who had a different dream in mind when he came into possession of the property.

Soon after turning the space into a $6 million clubbing venue, Mr. Richardson held a grand unveiling that welcomed over 250 esteemed guests, including Michael Jackson, Elizabeth Taylor, Diana Ross and many other Hollywood elite.

It's no wonder that in 1994, John Hay repurchased his now illustrious cave.

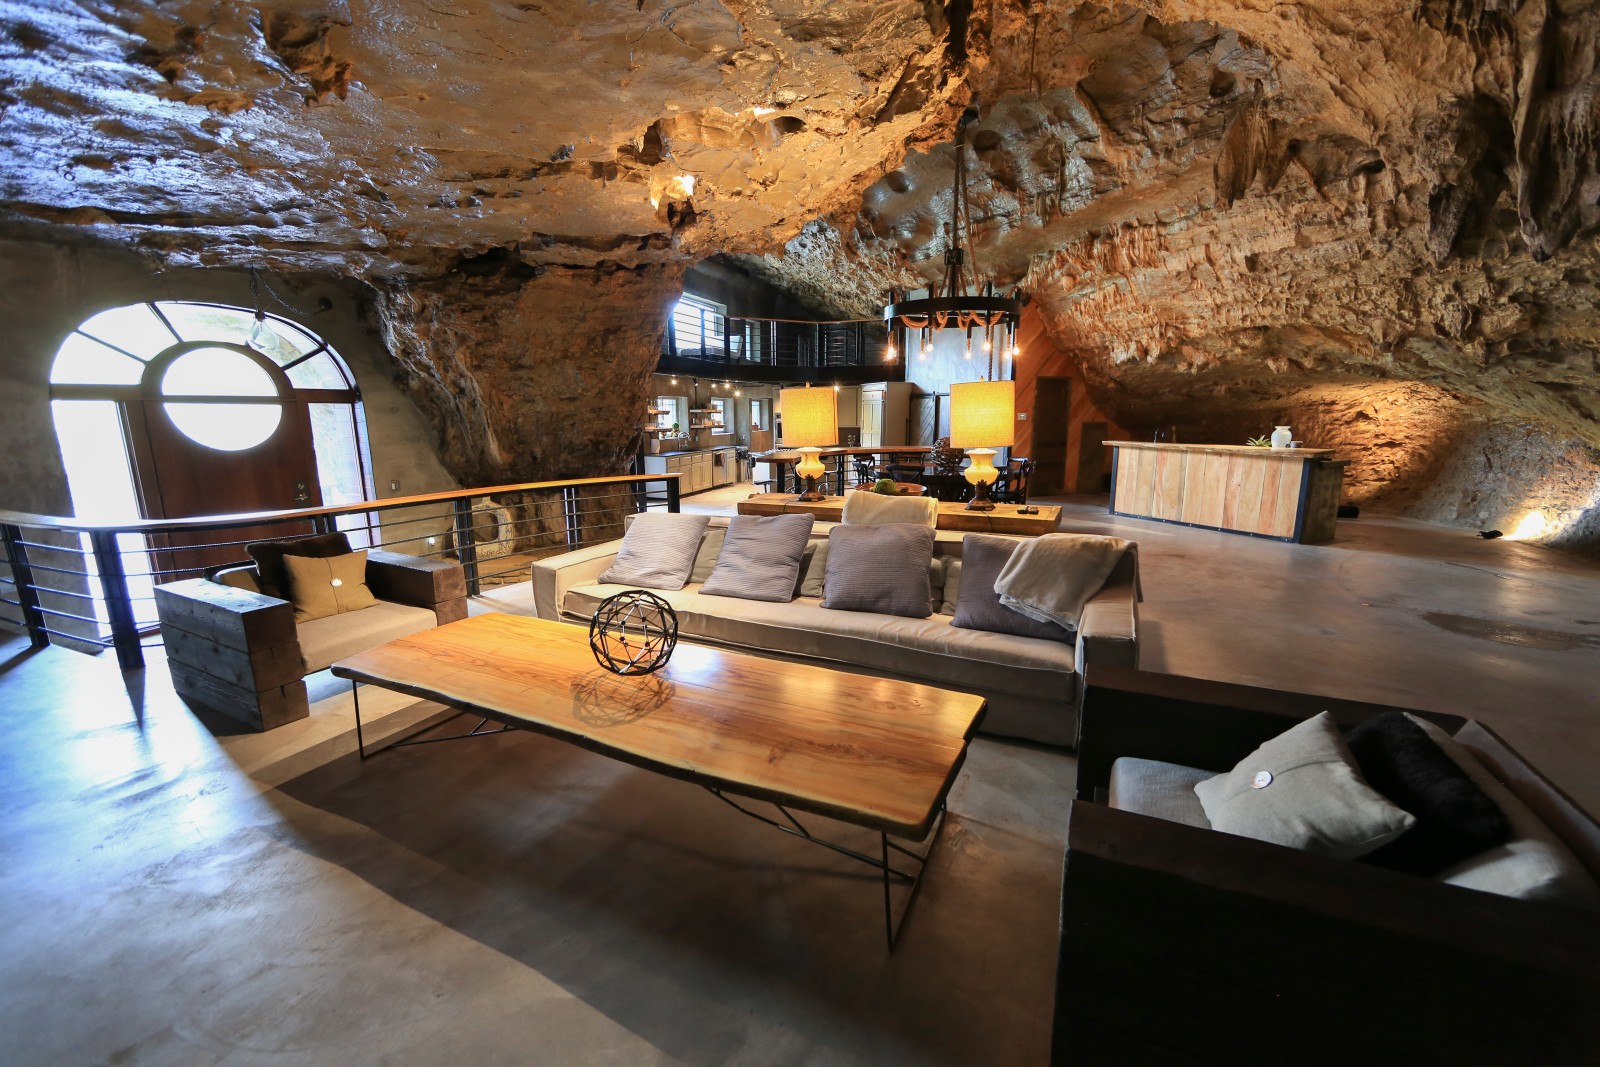
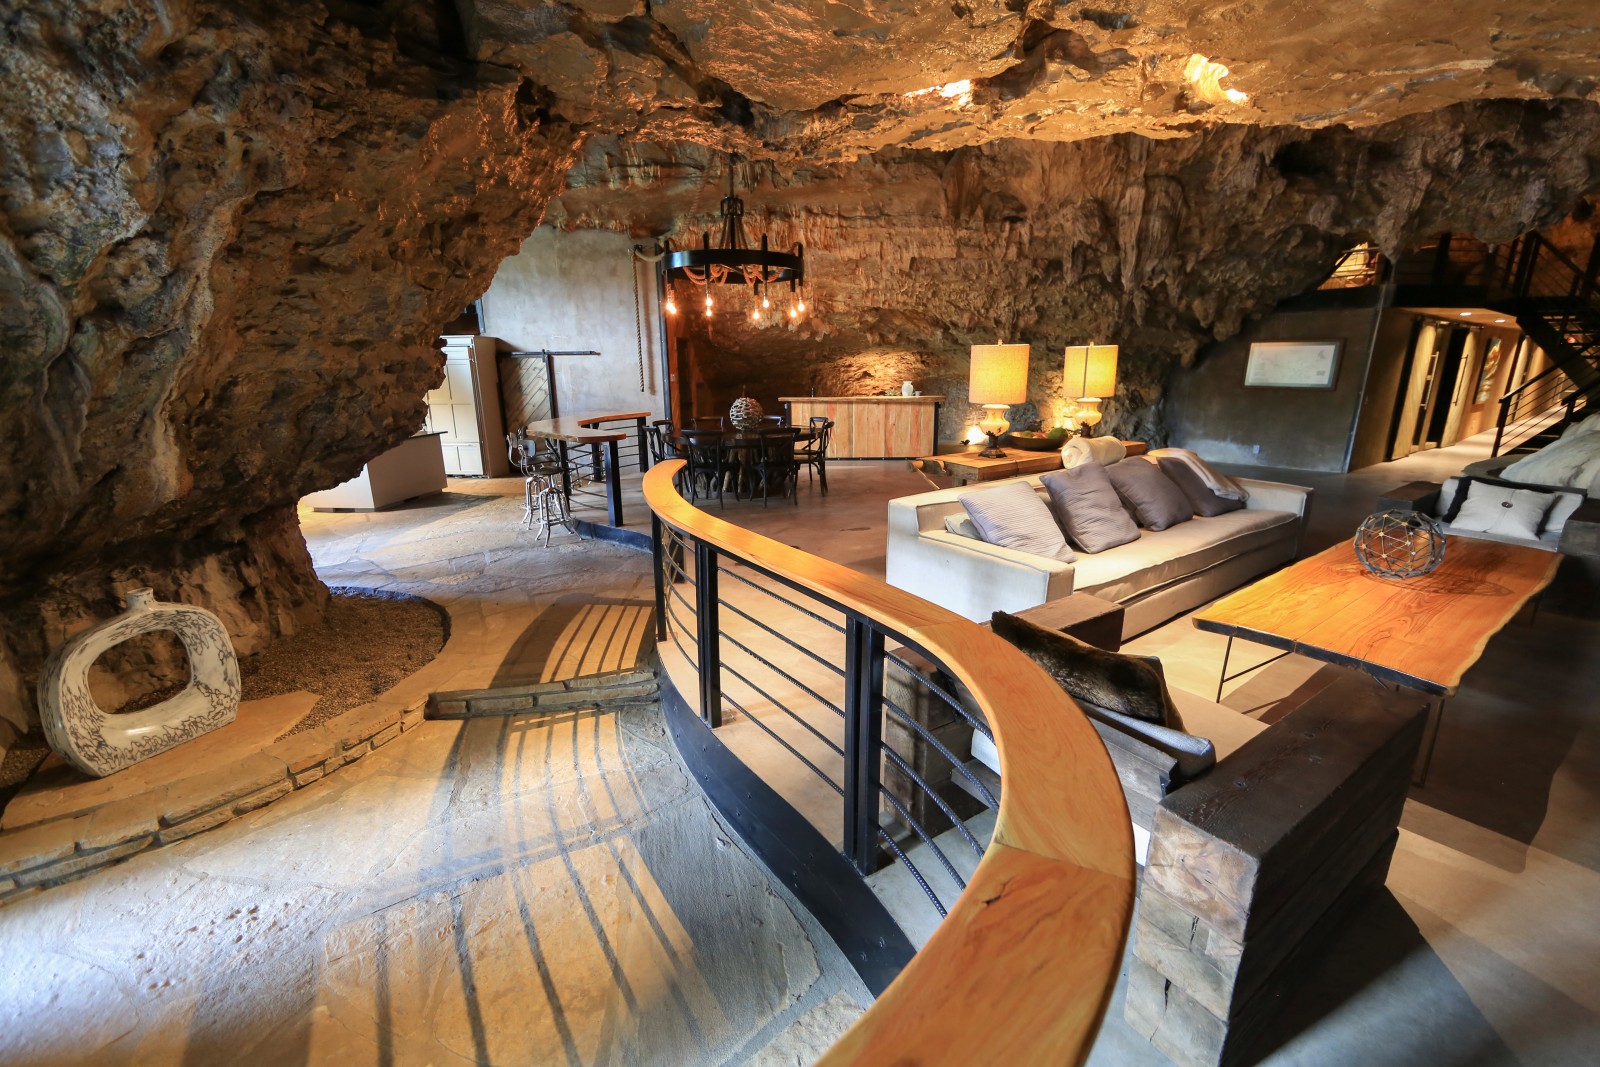
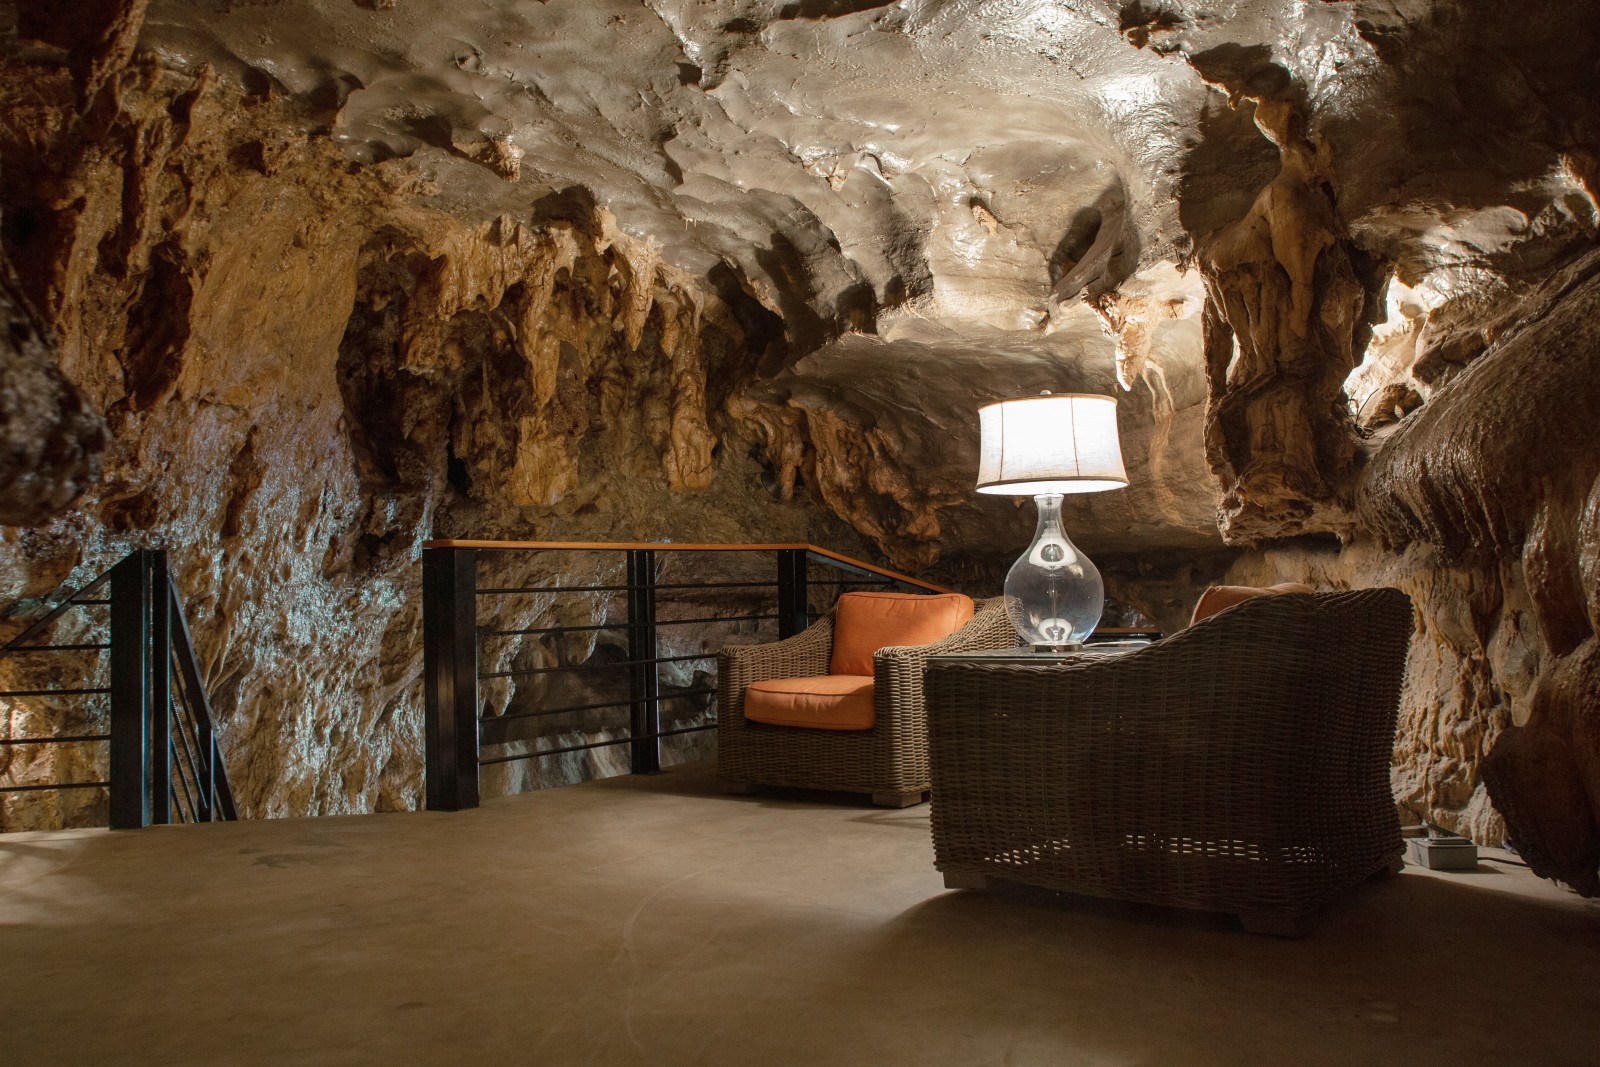
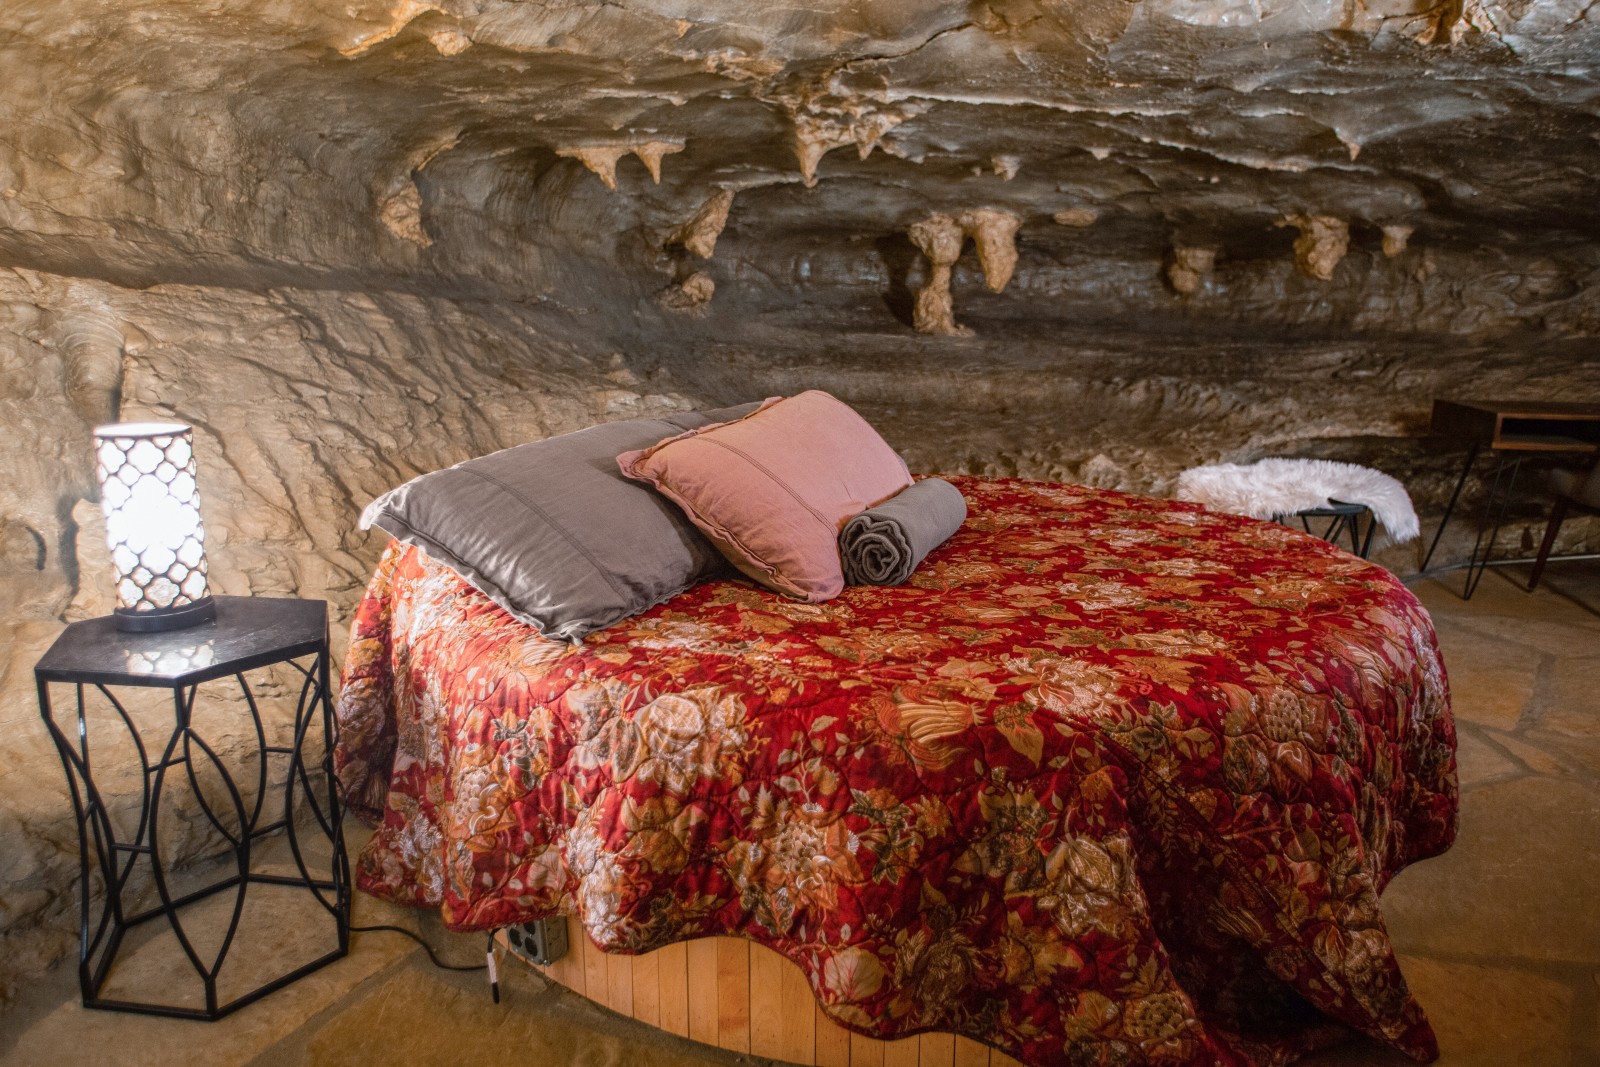
In the decades following, several new owners have taken hold of the 257-acre property, each one undoubtedly in awe of the great room’s 40-foot rock ceilings and 2,300 square feet. Stalactites descend from overhead throughout the 5,572-square-foot home, and raw rock has been used wherever possible to maintain the unique character of the space.

Though it's been renovated several times, the sprawling cave has kept its surprisingly cozy charm intact. Part of the reason the cave's natural features have been preserved is surely thanks to Hay, who reverently told People magazine in 1988 that the home's "original architect was God."

The bad news - every dream home comes with its own downfalls, after all - is that a few of the stalactites drip. However, the whole property is climate-controlled thanks to geothermal units throughout.

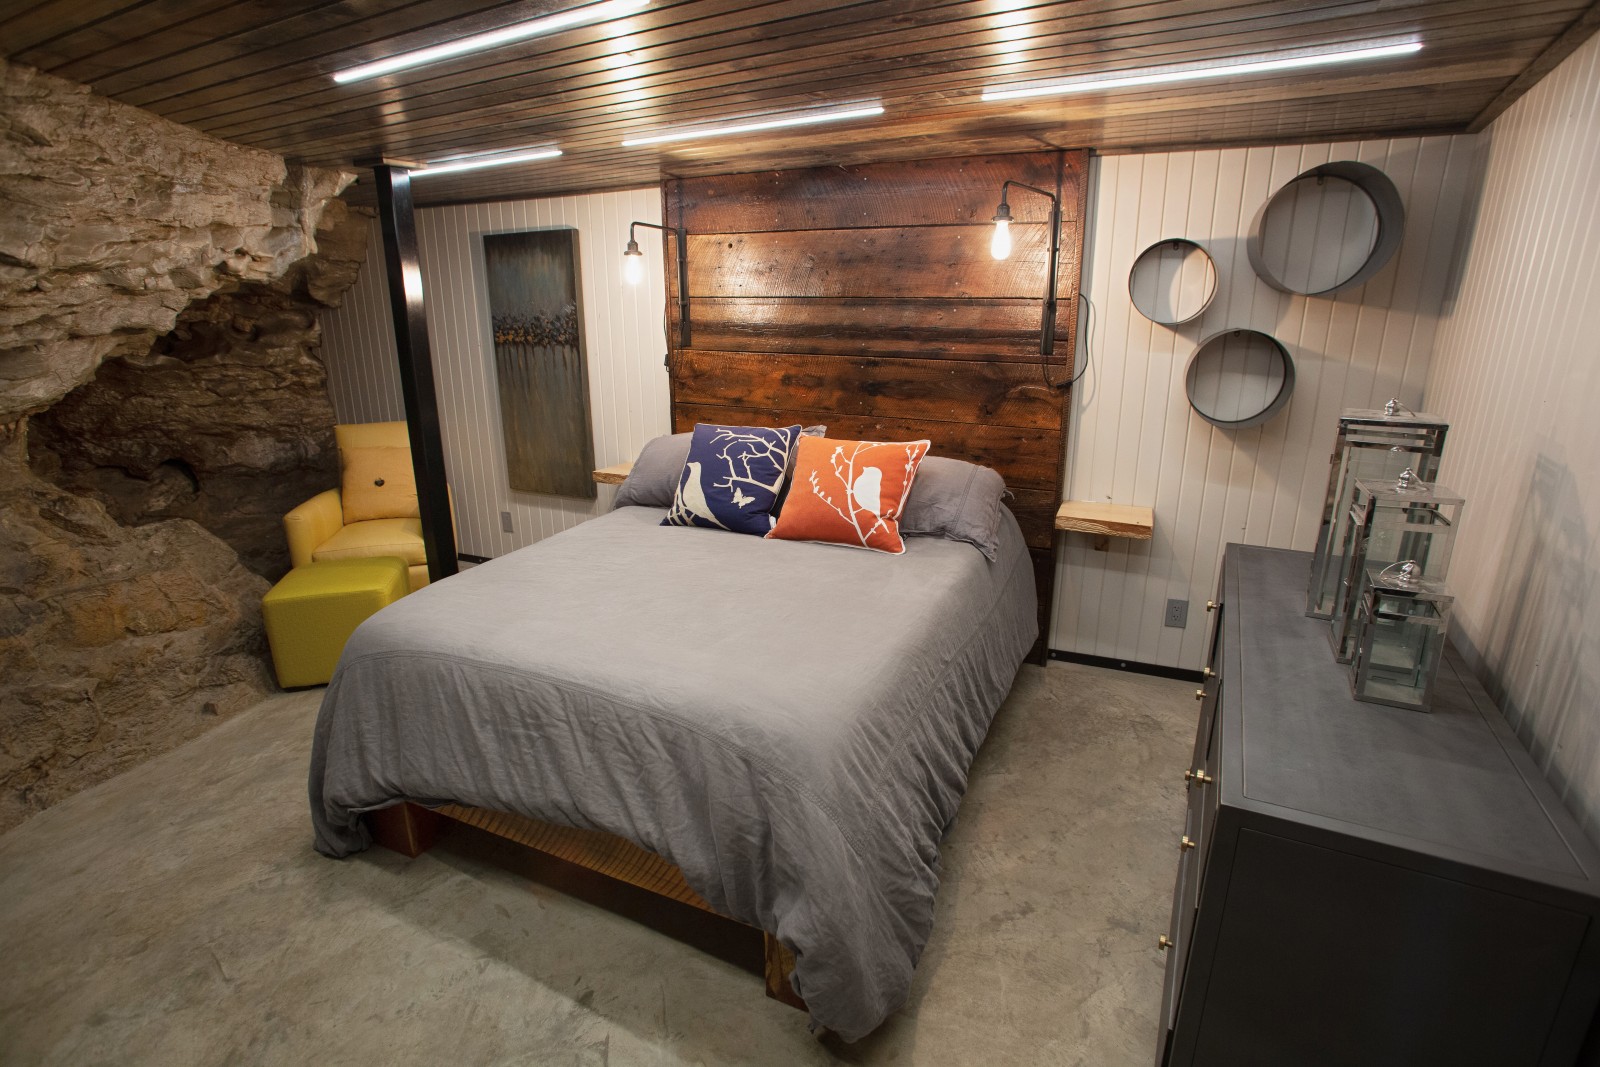
Update: The Beckham Creek Cave is no longer for sale, but it is for rent! The home has been transformed into a luxurious vacation rental, available for nightly stays, so anyone can now experience this unique space.

Related:

Originally published November 2018


via Zillow Porchlight https://ift.tt/2P8zfHn

Thursday, February 6, 2020

This Home Looks Like a Barn (But Has Enough Room to Be a Small Castle)

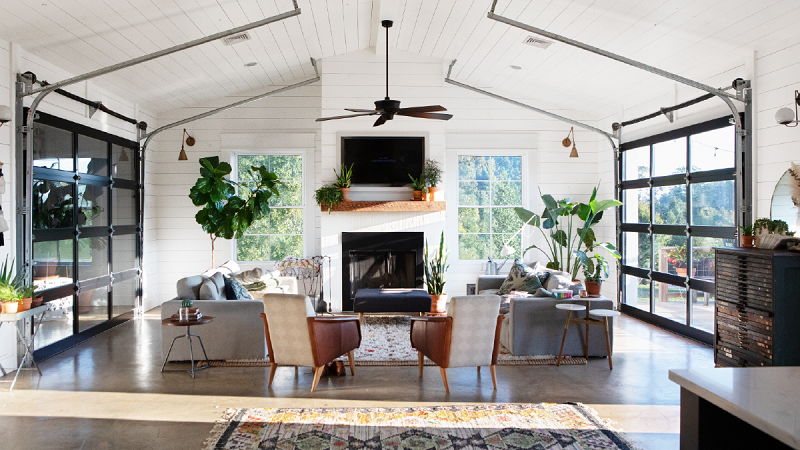
Like many married couples, the Clarks have a lot in common: a last name, a first name (they're both Kelly) and an affinity for wide-open spaces - which inspired them to build a 10,000-square-foot barn-style home on 30 acres of land in West Monroe, Louisiana. 

But let's back up. Kelly Clark (that's him) and Kelly Moore-Clark (that's her) wanted a change of scenery for their family. So when a friend put some land up for sale, they decided to make a move.

"We pretty much bought the property sight unseen because you couldn't walk through it," Moore-Clark says, referring to the thicket of overgrown trees and plants that carpeted the ground. "We bought the land and then crossed our fingers that, when we cleared it, we would find a spot to build the home."

Spoiler alert: They found that spot. The perfect location sat at the back of the property on a hilltop, far from the main road.

They immediately began working with a team of designers to create a plan for their space. The blueprints were beautiful, but something didn't feel quite right.

"We just couldn't pull the trigger on it. … It was just a gut feeling," Moore-Clark says. "I [felt] like whatever [was] supposed to be out here [was] supposed to be special."

Then, Moore-Clark's mother had an idea: Why not build a home that looked like a barn?

"I remember [my mom] specifically saying, 'You could roll the doors up and drive through the house,'" Moore-Clark says.

And that's when it all clicked. With the help of Moore-Clark's father, a former army draftsman, they made a new plan, hired a team of subcontractors and watched their home begin to take shape.

"It was a very organic [building] process," Moore-Clark says. "As the framers started framing it up, we would come into the room, and I would try to envision what our life [would look] like."

Moore-Clark doesn't have to use her imagination anymore. Today the couple, their three daughters, a dog, an old pony and 80 free-range chickens roam about the 10,000-square-foot home. And although they spend most of their time in a small fraction of the space, there's plenty of room to grow. Three main areas, to be exact.

At approximately 2,250 square feet, the east side of the home is where you can usually find the family. This area includes the bedrooms, the living room/kitchen area and the bathroom.

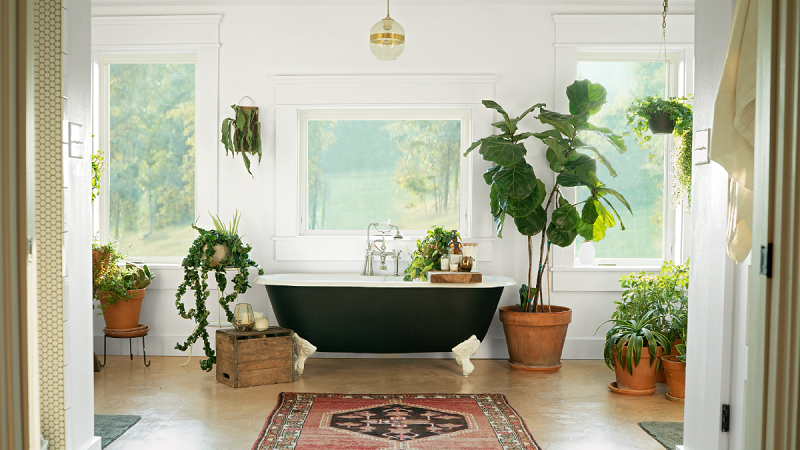
Speaking of that bathroom: "I wanted it to be like a little greenhouse," Moore-Clark says. Her vision for the bathroom predates the actual bathroom itself - she bought the tub before they started building.

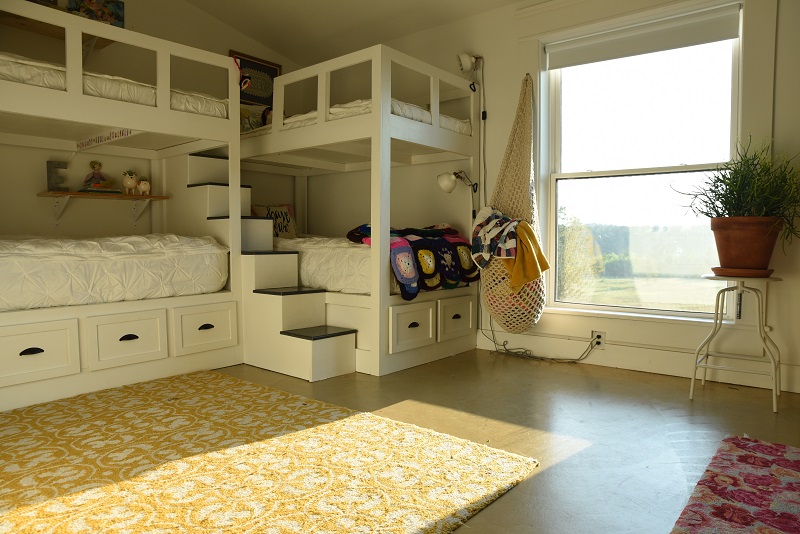
Even though there's room for dozens of bedrooms, the girls share one room, complete with custom-designed bunk beds.

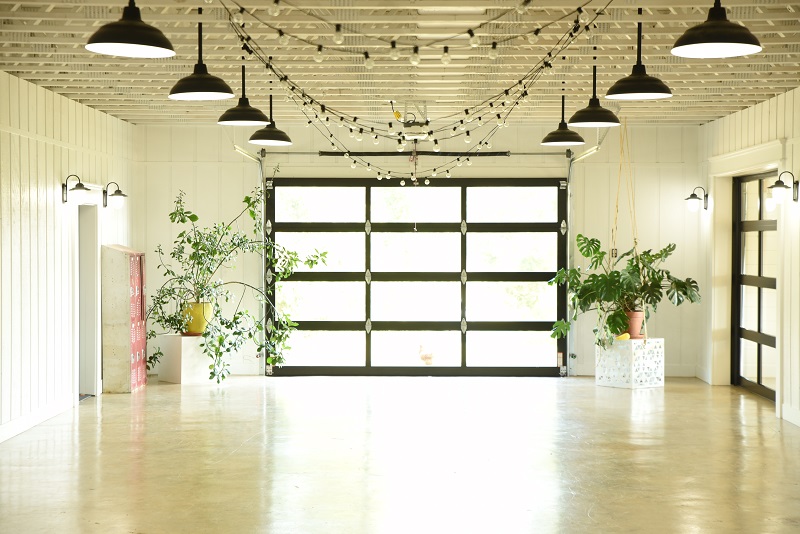
And then there's the breezeway. This is the second section of the home, and it's around 2,000 square feet. The breezeway is an indoor porch area with roll-up doors and plenty of living space.

"Lots of playing happens in the breezeway," Moore-Clark says. "[The girls] ride their bikes through it, put on musical events with their friends - ballets, plays, lots of things."  

Finally, there's the west side, which contains an office space, a home gym, a shop, and a guest bedroom and bathroom.

"When people stay … they really have their own space," Moore-Clark says. "You don't even hear each other. It's good for a little retreat."

The home is good for a lot of activities that fall outside the ordinary - it's hosted live music recordings, floral workshops and even a Christmas Eve church service.

So what compelled Clark and Moore-Clark to create a space so vast and so intimate at the same time? They're not really sure. Yet.  

"We feel like, one day, it's going to be used for something interesting. … [It's] a gut feeling." Moore-Clark says. "We don't know exactly why we built this place the way it is. But we knew it was right."

Photos by Seth MacMillan.

Related articles:

Originally published October 2018


via Zillow Porchlight https://ift.tt/2Og6hVm

Personalize Your Space With a DIY Gallery Wall

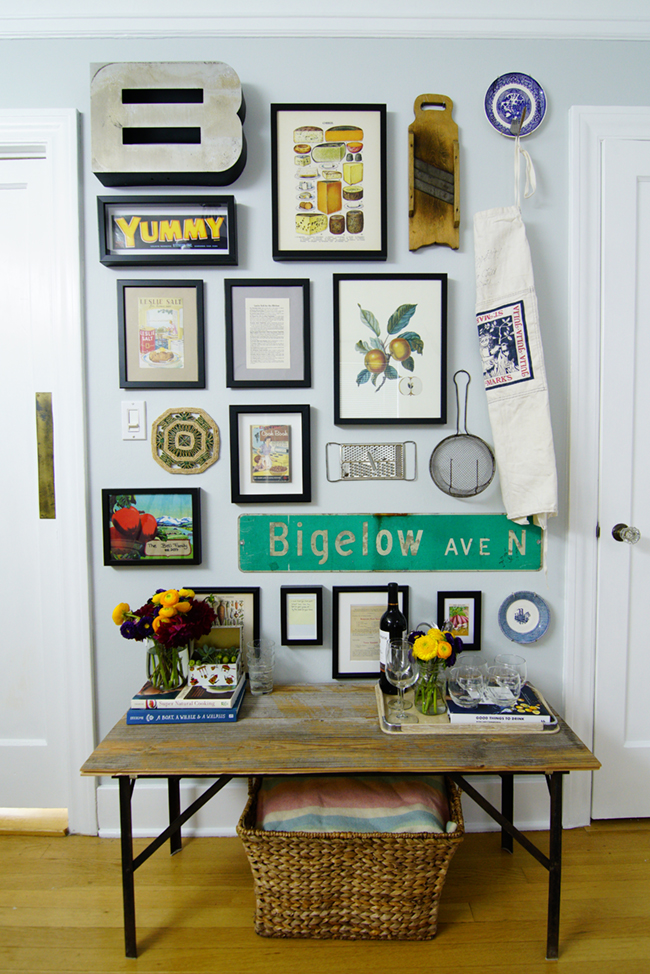
Blending interior design styles with a roommate or partner is all about including personal touches and pinpointing a shared interest or aesthetic. The floor-to-ceiling gallery wall we created for a special couple on the West Coast is a perfect example.

Homeowner Lauren and her fiance Greg are taking a big step: cohabitation. They’re recently engaged, and Lauren is making space for not only his furniture and accent pieces but also his style.

20160713_ErikHecht_DSC4610 sm

The active couple shares a love for food, wine and entertaining, so we set out to brighten the dining room.

Graced with iconic Seattle views of the waterfront, seaplanes and hillside homes, the dining room connects the home’s cozy living room with the kitchen, from which we drew foodie inspiration for the gallery wall.

When creating a gallery wall, it’s a good idea to create a balance of organic shapes and square corners.

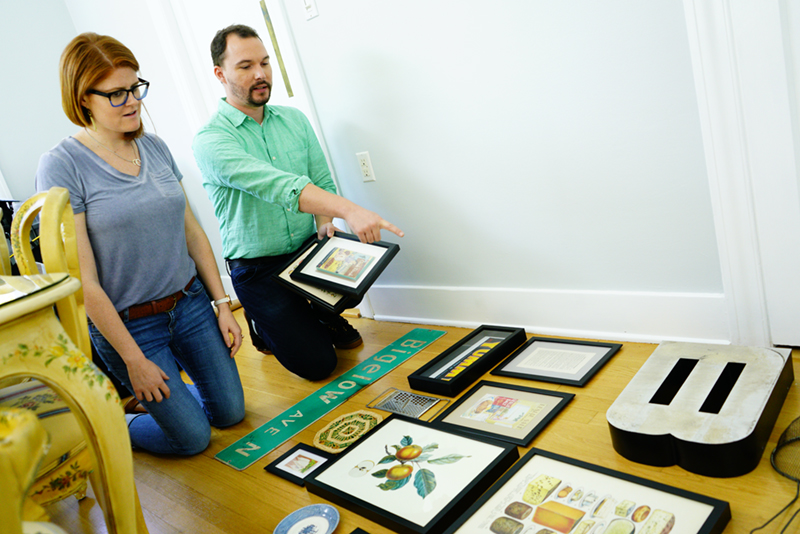
On Lauren’s wall, vintage cookbooks, antique kitchen tools and metallic shapes like street signs and decorative letters complement the framed art and images, while a variety of shapes and sizes provides visual interest.

Make a game plan

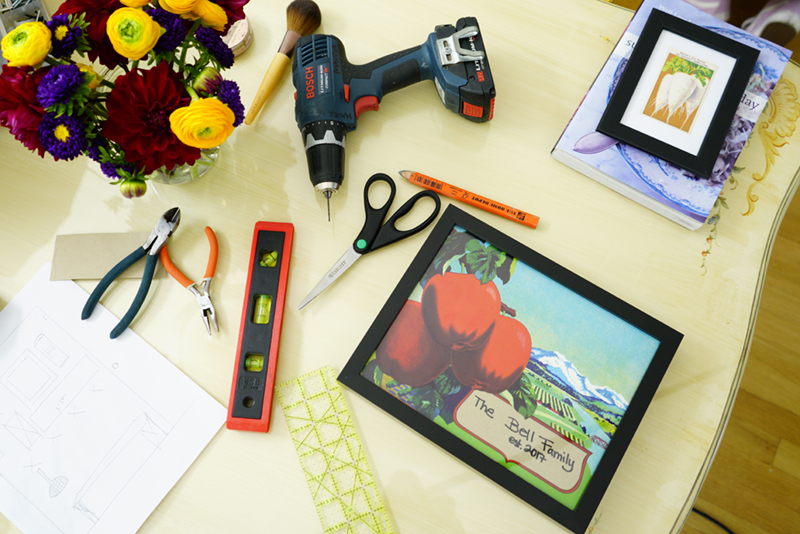
Lay the items out on the floor so you can try different arrangements - without hammering a single nail.

20160713_ErikHecht_DSC4295 sm

Once you’ve decided which items to include, trace their shapes on leftover wrapping paper or butcher paper, and then tape these templates to the wall to guide you in placing nails and hangers.

For a final touch, include a small piece of furniture at the bottom of your gallery wall. A chest or bench anchors the whole scene and makes a lovely spot for a row of glasses or a flower arrangement.

20160713_ErikHecht_DSC4674 sm


Related:

Originally published August 2016


via Zillow Porchlight https://ift.tt/2Hj1LSA